
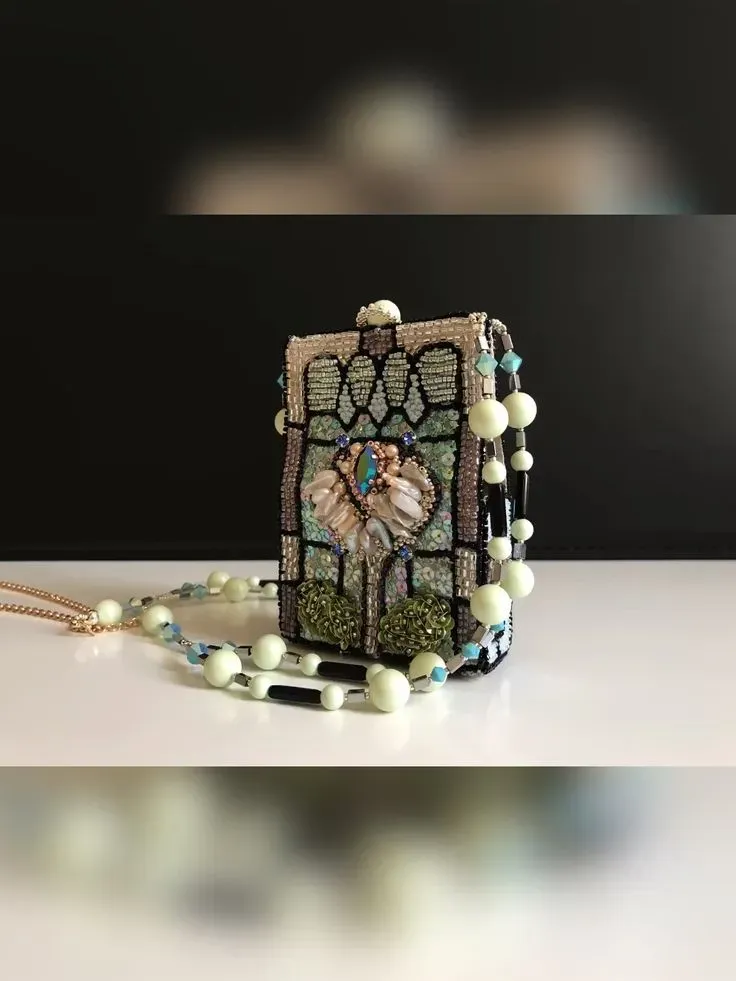
In the world of fashion and handmade crafts, 3D embroidery on bags has transformed everyday accessories into tactile art, inviting touch and conversation as light plays across raised stitches. Puff embroidery on accessories adds a raised, plush dimension by placing foam between fabric layers, allowing designers to sculpt flowers, creatures, and lettering with surprising gravity. This technique creates designs for bags, enabling depth that catches the eye from across a room and rewards slow, intentional viewing. For makers, it unlocks ideas that blend bold color choices with stable backing to withstand regular use while remaining flexible. From everyday totes to statement clutches, the combination of dimensional stitches and careful color pairing can elevate any bag into a wearable piece of art.
If you’re exploring dimensional stitching for bags within a broader craft palette, think of it as raised embroidery that uses padding or foam to lift motifs above the fabric. This approach can also be described as foam-backed stitching, layered applique, or plush texture work, all aimed at adding depth without sacrificing wearability. LSI-friendly terms include textured surface design, fabric applique on canvas or leather, and decorative padding that enhances both look and tactile appeal. By weaving these related concepts into your project notes, you capture a wider range of search intent while keeping the focus on bag embellishment. Ultimately, whether you label it dimensional embroidery, 3D textile art, or raised motif stitching, the core aim is the same: vivid, durable texture that elevates bags and accessories.
3D Embroidery on Bags: Elevating Everyday Accessories with Texture and Dimension
3D embroidery on bags transforms ordinary purses, totes, and wallets into tactile statements. By layering foam behind the stitching and carefully arranging appliqué elements, designers can create depth that catches the eye from every angle. This approach aligns with the idea of sculpted textile art, turning flat fabric into a mini relief that feels as good as it looks.
In practice, this technique blends puff embroidery with strategic layering to emphasize motifs while preserving the bag’s functionality. Selecting materials that support elevation—such as durable canvas, denim, or leather blends—helps maintain the piece’s wearability. When paired with careful color choices and clean outlines, 3D embroidery on bags becomes a versatile design language for personal expression or boutique branding.
Puff Embroidery on Accessories: Achieve Plush, Raised Motifs That Stand Out
Puff embroidery on accessories introduces a plush, raised dimension by placing foam padding between the fabric and the thread. This method makes motifs look as if they’re floating off the surface, adding visual interest and tactile appeal to wallets, pouches, and even hats. The effect is particularly striking on simple silhouettes, where the raised shapes become the focal point.
To maintain balance, it’s important to calibrate foam height and stitch density. Start with lighter padding (1–2 mm) and adjust as needed to avoid crowding seams or distorting the bag’s shape. When combined with durable base fabrics and tight stitching, puff embroidery elevates accessories with a sophisticated, gallery-worthy texture.
Textured Embroidery Designs for Bags: Layering, Color, and Depth in Every Stitch
Textured embroidery designs for bags rely on layered elements, multiple stitch types, and thoughtful shading to create depth. By building up features with foam, satin stitches, and detailed fills, designers can render flora, fauna, or geometric motifs that feel tactile and real. The result is a rich surface that engages both the eye and the hand.
Careful material selection matters here: choose fabrics that can bear multiple layers without puckering, and use stabilizers to prevent distortion. A well-chosen color palette—either high-contrast for drama or tonal for subtle texture—helps the design pop while maintaining durability for everyday use.
DIY Bag Embroidery Ideas: From Sketch to Stitch and Personalization
DIY bag embroidery ideas invite crafters to go from concept to execution with practical steps. Start with a simple motif, sketch or print a pattern, and test stitch lines on scrap fabric before transferring to the bag. This process mirrors the planning stage described in starter projects and encourages experimentation with scale, placement, and texture.
Documenting the progression—from pattern to stitched piece—can help you refine techniques and apply your ideas to future bags. For many makers, personalizing a tote or pouch with 3D elements or monograms turns a generic piece into something distinctly theirs, blending DIY bag embroidery ideas with the satisfaction of handmade craftsmanship.
Applique Embroidery on Fabric: Blending Cut Shapes with 3D Lift
Applique embroidery on fabric adds dimension by attaching cut fabric shapes to the base and then securing them with stitching. When combined with foam-backed details, appliqué creates a layered look that stands out against canvas, denim, or leather variants commonly used in bags. This technique offers a versatile approach to adding texture and narrative to accessories.
Finishing touches are essential: trim edges neatly, use stabilizers to prevent fraying, and ensure that the appliqué seams are smooth and durable. Pairing applique with 3D stitching lets you experiment with mixed media—fabric scraps, suede patches, or leather accents—while maintaining a cohesive, long-lasting design.
Tools, Materials, and Best Practices for Durable 3D Embroidery on Bags
Durable 3D embroidery on bags starts with the right stabilizers, foam padding, and high-quality embroidery threads. A sturdy cut-away stabilizer helps manage foam layers and prevents fabric distortion, especially on heavier materials like canvas or denim. Choosing the correct foam thickness and thread weight (30–45 wt) supports consistent elevation and clean outlines.
Practical care and technique choices influence longevity: stabilized transfers, proper back-ending of threads, and gentle pressing from the back with a protective cloth help preserve the raised motifs. When designers test on scraps and tailor tension, sampling the finish ensures the 3D effect remains robust through daily use and occasional laundering.
Frequently Asked Questions
What is 3D embroidery on bags and how does it differ from traditional flat embroidery?
3D embroidery on bags uses foam padding or felt behind stitches to lift the design, creating puff embroidery on accessories with real dimension. Unlike flat embroidery, 3D techniques add depth, layering, and tactile texture by stacking foam and appliqué shapes to produce raised motifs on bags.
What materials and tools are essential for creating 3D embroidery on bags?
Key materials include a sturdy stabilizer, foam padding (1–2 mm) or felt, polyester embroidery threads (40–45 wt), and appropriate needles for either hand or machine stitching. You’ll also need a backing such as fusible web, transfer methods for accuracy, and finishing tools. Foam-backed textures are central to puff embroidery on accessories, while applique embroidery on fabric can add layered elements.
Which design ideas work best for 3D embroidery on bags to achieve texture and impact?
Popular ideas include flora and fauna with layered petals, geometric shapes for a modern look, typographic accents, landscapes, and animal motifs. These textured embroidery designs for bags create depth with foam height and careful shading, while branding elements stay subtle yet raised.
How can I start a DIY bag embroidery project using 3D techniques?
Start with a simple bag and a small motif. Create a pattern, stabilize the fabric, and cut foam to fit the raised areas. Stitch outlines with a tight satin or outline stitch, then layer inner details and apply appliqué if needed. This DIY bag embroidery idea emphasizes planning, foam placement, and sequential stitching to build dimensional texture.
How do I care for and ensure the durability of 3D embroidery on bags?
Choose durable fabrics like canvas or denim and secure all thread tails. Avoid high heat on foam-backed areas and spot-clean as needed; air-dry and reshape gently. Proper stabilization and careful back-side finishing help 3D embroidery on bags withstand daily use.
What common challenges arise with 3D embroidery on bags and how can I troubleshoot them?
Common issues include puckering, foam shifting, loose threads, and flat areas under raised motifs. Solutions: use a sturdy stabilizer, baste or lightly glue foam in place, adjust stitch density and tension, and add a second foam layer where transitions need smoothing.
| Topic | Key Points |
|---|---|
| What makes 3D embroidery on bags compelling? | Adds volume to surface design; puff embroidery creates a raised look; layered appliqué adds depth; precise stitching defines clean outlines; versatile from everyday totes to high-fashion accessories. |
| Basics and differences from flat embroidery | Uses foam or felt behind stitching to lift elements; combines free-motion outlines, satin stitches, and decorative stitches; color ranges from bold/high-contrast to soft/tonal; durable for daily wear. |
| Key terms | Puff embroidery (foam padding under motif); Foam embroidery; Applique (fabric shapes attached before stitching). |
| Design ideas for 3D embroidery on bags and accessories | Flora and fauna; Geometric/abstract shapes; Typographic accents; Nature landscapes; Animal motifs; Branding/logos; Mixed-media textures. |
| Materials and tools | Stabilizers; Foam padding or felt; Thread and needles; Backing and appliqué materials; Stabilized transfer methods; Finishing tools. |
| Step-by-step starter project | Choose a bag/design; Create pattern; Stabilize fabric; Attach foam; Stitch outlines; Layer inner details; Secure final details; Finish and care. |
| Applications on different bags and accessories | Tote bags; Backpacks; Wallets and pouches; Denim jackets and hats; Leather/faux leather; Scale considerations. |
| Color, texture, and durability considerations | High-contrast or tonal color choices; Build depth with layering; Durable fabrics and secure threads; Care tips (spot-clean, avoid heat on foam). |
| Troubleshooting common issues | Puckering/fabric distortion; Foam shifting; Loose threads; Flat areas; Fixes: stabilizer, foam alignment, trimming. |
| Design inspiration and trends | Seasonal palettes; Nature-inspired textures; Minimalist 3D accents; Personalization and branding. |
| Sustainability and upcycling ideas | Upcycle existing bags; Choose durable fabrics; Reuse foam scraps; Document process. |
Summary
3D embroidery on bags offers a dynamic way to fuse craft with fashion. By layering foam, using thoughtful color palettes, and exploring diverse motifs—from flora to branding—you can create accessories that stand out with tactile depth and visual impact. Plan carefully, test materials, and practice your stitching techniques to build confidence and consistency. Whether you’re enhancing a tote for daily use or crafting a boutique line of bags and accessories, 3D embroidery opens a world of possibilities that blend artistry with practicality. Embrace the texture and let your designs tell a story through dimension and color.