
3D embroidery stitches transform a flat piece of fabric into a textured, dimensional artwork. When you design 3D embroidered pieces, the choice of stitches isn’t just about filling space—it builds form, texture, and storytelling into the piece. This guide helps you select the right stitches for 3D embroidery, understand which stitches work for different textures, and bring designs to life with depth and durability. Together, exploring 3D embroidery techniques, embroidery stitch types, texture stitches for 3D embroidery, stitch selection for 3D art, and layered embroidery stitches gives you a toolkit for sculptural effects. As you practice, test different thread types and underlays to ensure your dimensional stitching remains durable and expressive.
In other terms, the technique translates into relief on fabric through raised stitching and layered textures. Practitioners build volume with padding underlays, variable stitch density, and a mix of threads to create sculptural surfaces rather than flat patterns. LSI-friendly terms like relief stitching, volume-focused embroidery, and textured surface work together to describe the same practice as 3D embroidery. By selecting padding, underlay shapes, and contrasting stitches, artists guide light and shadow to emphasize depth and form.
Mastering 3D embroidery stitches: Foundations of Layered Embroidery Techniques
3D embroidery stitches transform a flat piece of fabric into dimensional art by combining an underlay foundation with raised stitches. This approach is a core part of 3D embroidery techniques, and it requires selecting embroidery stitch types that support height and form.
When planning, consider design goals, fabric type, and materials to determine padding, layering, and texture strategies. Embrace layered embroidery stitches to build depth gradually, ensuring the piece remains flexible and durable.
Core Stitch Types for Dimensional Texture in 3D Embroidery
Padded satin stitch, long and short stitches, and chain or brick stitches are foundational for creating texture and volume in 3D pieces. These stitches contribute to tactile dimension by building smooth surfaces, soft shading, and ribbed textures that read as depth when viewed up close.
As you design, match each stitch type to the texture you want—bark, fur, petals, or scales—while varying density and direction. This approach highlights the role of texture stitches for 3D embroidery and informs your stitch selection for 3D art across different subjects and fabrics.
Texture Stitches for 3D Embroidery: Creating Visual and Tactile Depth
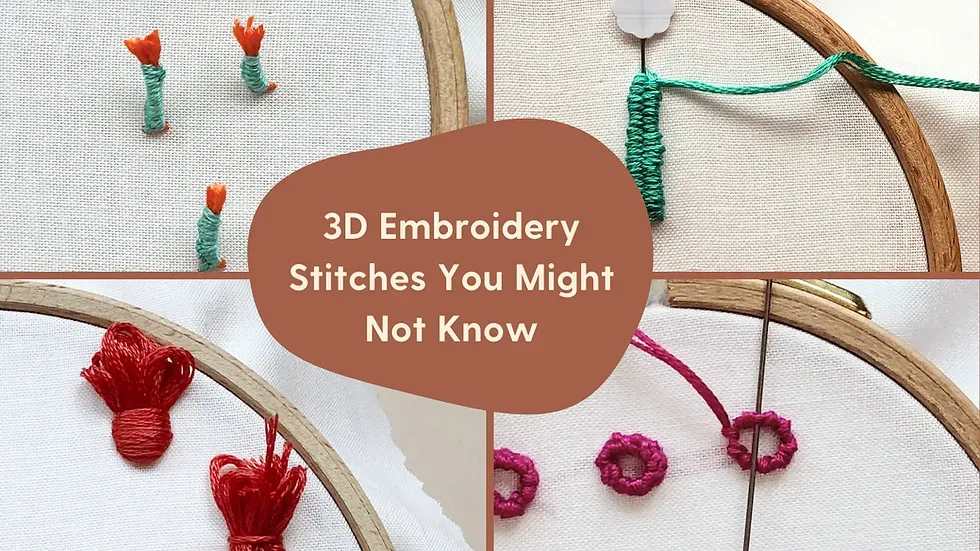
Texture stitches for 3D embroidery add tactile interest that appeals to the sense of touch as well as sight. Bullion knots, French knots, pistil stitches, and raised seed-like elements can become focal accents that capture light and cast gentle shadows on the surface.
Layer these textures over a padded or underlaid base to maximize dimensional effect. The combination of texture stitches with layered embroidery stitches helps you achieve believable depth, whether you’re rendering petals, fur, or coral-like details.
Choosing Stitches for Your Subject and Fabric Type: Stitch Selection for 3D Art
The subject guides stitch choice: botanical and animal subjects benefit from a mix of padded satin and long-and-short shading to model curves and fur, while bark textures or scales may come alive with clustered chain or brick stitches. Also consider focal points created by raised stitches such as French knots or pistil stitches.
Fabric type and support drive decisions about padding, stabilizers, and whether to use machine or hand work. In heavier fabrics you can push height more easily, while lighter fabrics may require lighter padding and stable underlays to prevent distortion.
Layering, Padding, and Height: Building Dimension with Layered Embroidery Stitches
Depth in 3D embroidery comes from careful layering and padding. Start with a sturdy underlay on a stable base, then add height with padding kept minimal to avoid stiffness. Layered embroidery stitches let you build form gradually, giving volume while maintaining fabric suppleness.
Padding options include lightweight batting, felt, or foam placed strategically under raised areas. By varying where and how you pad, you can sculpt petals, scales, or wings and achieve controlled height that stays durable during handling and display.
Tools, Materials, and Practical Guidance for Successful 3D Embroidery
A well-rounded toolkit supports dimensional stitching: mix threads such as perle cotton, embroidery floss, silk, and metallic fibers; select needles suited to your fabric and stitch style; and pair stabilizers with appropriate padding. The right combination helps you realize height without compromising stability.
Practical steps include planning your stitch map, underlay first, padding second, and texture last. Be mindful of common mistakes like over-padding, uneven height, and tension issues, and practice on scraps to refine stitch selection for 3D art before committing to your final piece.
Frequently Asked Questions
What are 3D embroidery stitches and how do they work in 3D embroidery techniques to add depth?
3D embroidery stitches are techniques that add height, volume, and tactile interest to fabric. In 3D embroidery techniques, you build in layers: a stable underlay provides shape, then raised stitches protrude to catch light and shadow. Common stitches used in 3D embroidery stitches include padded satin stitch, long-and-short stitches for shading, chain and brick stitches for texture, bullion knots for height, and French knots for highlights. By pairing these embroidery stitch types with controlled padding and layering, you create dimensional form that remains durable and expressive.
Which embroidery stitch types are essential for layered embroidery stitches in 3D art?
Core stitch types form the backbone of layered embroidery stitches in 3D art. Prioritize padded satin stitch for rounded forms, long-and-short stitches for shading, chain and brick stitches for textured surfaces, bullion knots for dramatic height, and French knots or pistil stitches for tiny raised accents. Use an underlay to define shapes and then apply these stitches in layered passes to build height and depth, balancing texture with structure.
How can texture stitches for 3D embroidery be used to create tactile surfaces?
Texture stitches for 3D embroidery are chosen to mimic natural surfaces and add tactile variety. Use chain or brick stitches for ribbing or scales, padded satin for smooth raised areas, and long-and-short stitches for soft shading on petals or fur. Combine with couching, beads, or small accents to create reflective highlights and extra dimension, while keeping an underlay and padding to support the raised texture.
How do you apply stitch selection for 3D art when working with different fabrics?
Stitch selection for 3D art depends on subject, fabric, and the intended height. Botanical or animal subjects often benefit from padded satin and long-and-short shading, while abstract pieces may use brick or couching for bold structure. Choose fabrics with sufficient stability or add stabilizers, and decide between machine efficiency and hand control. Start with an underlay, then select stitches that build height where you want emphasis and use base fills elsewhere.
What techniques help build depth and structure in 3D embroidery stitches?
Key techniques include layering and underlays to stabilize the design, padding options to create deliberate height, and variation in stitch density to simulate form. Thread selection and layering—mixing perle cotton, silk, and metallic threads—add surface contrast, while beads or sequins can provide reflective highlights. Couching can add volume and allow you to combine different textures, all supporting layered embroidery stitches that read as depth.
What common mistakes should be avoided in 3D embroidery stitches, and how can I prevent them?
Avoid over-padding, uneven height, and inconsistent thread tension, which cause stiffness, distortion, or lumpy surfaces. Choose fabrics with adequate support and pair with stabilizers. Plan color and light interactions to prevent flat-looking areas, and test padding on scrap fabric before stitching the final piece. Secure knots well and finish with a light press from the back to settle the raised areas.
| Key Point | Description |
|---|---|
| Definition and purpose | 3D embroidery stitches create height, volume, and tactile interest, turning a flat piece of fabric into dimensional artwork. They are used to build form, texture, and storytelling in embroidery projects. |
| Layering and structure | Stitches are built in layers: an underlay foundation for stability, followed by elevated stitches that protrude from the fabric. The right combination depends on design goals, fabric, and materials. |
| Core stitch types for depth |
|
| Techniques to build depth |
|
| Choosing stitches for subject and fabric type |
|
| Materials and tools |
|
| Step-by-step approach to selecting stitches |
|
| Avoiding common mistakes |
|
| Practical project ideas |
|
Summary
The key points above summarize how 3D embroidery stitches create dimensional, textured artwork by layering underlays, padding, and varied stitch types, guided by material choices and technique combinations.