
DTF transfers have transformed the DIY apparel scene, giving makers and small shops a reliable way to produce vibrant designs on fabric. For beginners, many readers seek practical tips to start strong. To help you start strong, we cover practical DTF heat press tips that improve consistency and hand feel. If issues appear, a structured troubleshooting approach can save material and frustration. This guide introduces a tested workflow, emphasizing planning, testing, and careful calibration to build confidence from the first print.
If you’re already comfortable with the basics, you can frame this as direct-to-film printing that uses an adhesive layer to lock vibrant artwork into fabric. From an LSI perspective, other phrases like film transfer technology, heat-activated graphics, and the DTF workflow describe the same method from slightly different angles. This broader language helps you connect DTF to related textile print processes and pick up best practices for different fabrics and finishes. By thinking in these terms, you’ll stay adaptable as you refine your process, document results, and implement scalable workflows. This broader framing keeps the conversation accessible while pointing readers toward practical next steps, equipment checks, and reproducible results. As confidence grows, you will be ready to test on real orders, track outcomes, and refine your process with documented learnings.
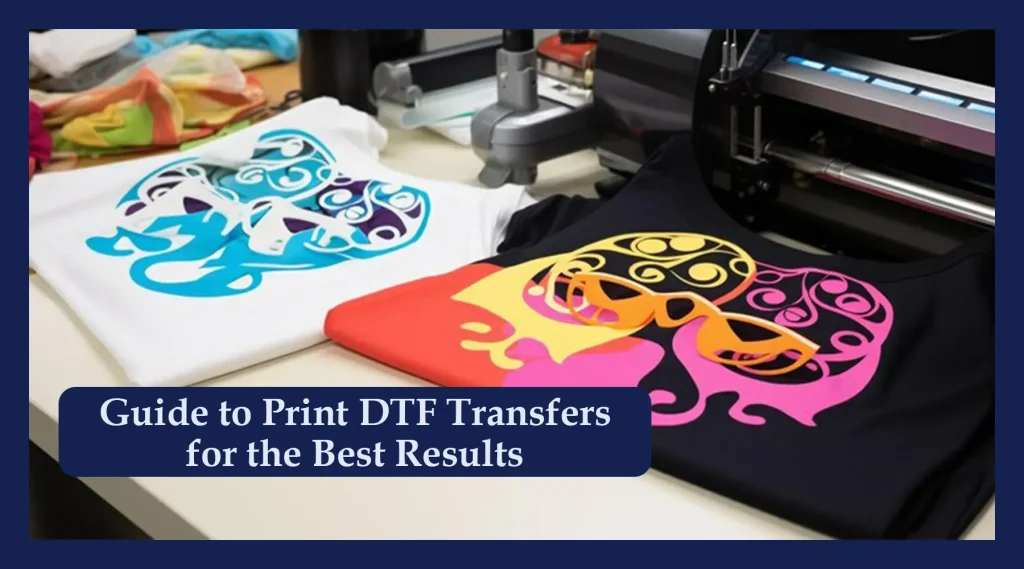
DTF Transfers for Beginners: A Practical Roadmap to Start Strong
If you’re new to DTF transfers, this roadmap helps you move from curiosity to consistent results. This guide covers DTF transfers for beginners by outlining practical steps: artwork quality, powder curing, alignment, heat pressing, and post-care. You’ll learn how small adjustments reduce waste and improve color, durability, and hand feel. Use this as a structured starting point to build confidence and avoid common DTF printing mistakes.
Begin with a simple test plan and document results. Emphasize the importance of high-resolution artwork (300 dpi or higher) and proper color separation; this is where many beginners trip up on common DTF printing mistakes. As you progress, apply DTF transfer troubleshooting techniques to fine-tune heat press settings, curing, and alignment for your specific fabrics.
Common DTF Printing Mistakes and How to Fix Them
Even small missteps can cascade into poor transfers. This section highlights common DTF printing mistakes and how to approach fixes, from artwork quality to post-press care. Understanding the root causes helps you prevent issues before they appear, saving material and time.
For each mistake, pair a practical fix with a quick test. For example, if edges are blurry, increase resolution and test on scrap fabric; if adhesion is poor, verify curing and use a controlled heat sequence. Keep a brief log so you can reference what worked and what didn’t, aligning with DTF heat press tips and other best practices.
DTF Transfer Troubleshooting: Diagnosing Issues Quickly
When results don’t meet expectations, a structured troubleshooting approach helps you isolate causes fast. This subtopic covers how to approach DTF transfer troubleshooting with a repeatable checklist: artwork, curing, print film, and press parameters.
Use a small set of test fabrics to compare variables, and document changes. Track outcomes like color saturation, edge detail, and adhesion strength. This cycle of testing mirrors what pros do in DTF transfers for beginners, enabling faster learning and fewer surprises on larger runs.
DTF Heat Press Tips: Getting Consistent Results Every Run
Achieving consistent results starts with the press. This section shares practical tips on temperature, dwell time, pressure, and platen setup to minimize ghosting and misregistration.
Tip examples: calibrate heat with a reliable thermometer, use a silicone sheet to distribute pressure, and perform a quick dry run before each project. Regularly test different fabrics and update your operating procedures; this is essential for reliable DTF transfers in a busy workflow.
How to Fix DTF Errors: A Step-by-Step Diagnostic Roadmap
This is a practical, step-by-step path to diagnose and correct common errors. Start with symptom-based questions, then verify settings, curing, alignment, and post-press handling. Each step reduces guesswork and moves you toward a repeatable process.
Create an action plan: list your equipment, materials, and the exact steps used for each project, then compare results against a baseline. This roadmap helps you scale while maintaining quality and aligns with the documentation emphasis in the base content.
Artwork and Garment Prep for Reliable DTF Transfers
A strong start often depends on artwork quality and garment preparation. This section covers choosing high-resolution designs, clean vector formats, proper color separations, and pre-press steps to remove moisture and wrinkles. For beginners, optimizing artwork is essential in DTF transfers for beginners.
Pre-press and alignment basics ensure even contact with the transfer film, reducing risks of misregistration. Document fabric types and test swatches to refine your process, and integrate a simple post-press care plan to preserve transfer quality.
Frequently Asked Questions
DTF transfers for beginners: what is the right starting approach?
DTF transfers for beginners start with high-resolution artwork (300 dpi or higher) and test prints on scrap fabric. Ensure the adhesive powder is cured per the manufacturer’s guidelines, and pre-warm the garment to reduce wrinkles. Align the transfer using registration marks, then press at about 160-165°C (320-329°F) for 12-15 seconds with steady pressure. Follow the recommended peel and post-press care to protect color and durability.
Common DTF printing mistakes: what are the major ones to avoid and how?
Common DTF printing mistakes include low-resolution artwork, incomplete curing of the adhesive powder, incorrect heat press settings, and poor alignment. To avoid them, start with artwork at 300 dpi or higher and use vector formats where possible; cure the powder fully before pressing; establish baseline temperature, time, and pressure, then test on similar fabrics; and use alignment aids to place designs accurately.
DTF transfer troubleshooting: what steps should I take when transfers don’t adhere properly?
DTF transfer troubleshooting starts with checking the basics: ensure the adhesive is properly cured, the peel stage is correct (hot vs cold), and the heat press temperature and dwell time match the fabric. Do test swatches on the same fabric and adjust pressure and time as needed, verify garment prep to remove moisture and wrinkles, and re-check alignment if needed.
DTF heat press tips: what are essential practices for consistent results?
DTF heat press tips include calibrating your temperature to the recommended range (approximately 160-165°C / 320-329°F) with 12-15 seconds dwell time and even pressure. Use a pre-press to remove moisture, an even pressing surface, and a silicone sheet or heat press mat to protect prints. Always run test heats on similar fabrics before final runs, and ensure consistent peel instructions.
How to fix DTF errors: practical steps to correct issues during production?
How to fix DTF errors involves addressing the root cause: cure level, peel stage, press settings, and fabric compatibility. If edges lift or whitening occurs, re-press with the correct peel and pressure; adjust curing or post-press time; verify fabric type and consider different films or adhesives. Maintain a simple SOP to record settings and results for reproducibility.
DTF transfers for beginners: what should a simple step-by-step workflow include?
DTF transfers for beginners benefit from a compact workflow: prepare high-resolution artwork, print on DTF film and apply adhesive powder with proper curing, pre-warm the garment and align using marks, press at the recommended temperature, time, and pressure, perform the defined peel, cool appropriately, and follow post-care guidelines while documenting results for repeatability.
| Topic | Key Points |
|---|---|
| What DTF transfers are | Transform the DIY apparel process by applying vibrant, durable designs to fabric; beginner-friendly promise includes crisp images, soft hand feel, and the ability to run small batches without the complexity of traditional screen printing. |
| Benefits for Beginners | Low entry barrier, quick wins with visible results, and a simpler workflow for small runs compared to traditional methods. |
| Learning Curve | The guide focuses on common mistakes and practical fixes to improve results, save material, and build confidence in your transfer workflow. |
| Common Mistakes (and Fixes) | Suboptimal artwork; Inadequate curing; Incorrect heat press settings; Poor alignment; Garment prep neglect; Fabric compatibility; Premature or delayed peeling; Inadequate post-press care; Insufficient workflow documentation; Equipment quality gaps. Fixes include: use high-res artwork (300 dpi+), cure powder properly, establish a baseline press, use alignment aids, pre-warm garments, test fabrics, follow peel schedules, provide post-press care guidance, document SOPs, and ensure reliable equipment. |
| Action Plan | Start with high-res artwork and test on scrap; Cure adhesive powder per supplier; Establish baseline press settings and test on similar fabrics; Use alignment aids and pre-press garments; Build swatch library with documented results; Follow peel guidance and re-test; Create SOP; Maintain equipment quality. |
| Practical Tips | Test prints on similar fabrics; Calibrate color management; Use a heat press mat or silicone sheet; Keep workspace clean; Label/organize transfers; Start with small batches. |
| Step-by-Step Quick-Start Guide | Prepare artwork (300 dpi+); Print on DTF film and cure; Align transfer on a pre-warmed garment; Press per temp/time/pressure; Peel as instructed; Wash/care for garment. |
| Advanced Considerations | Color management across runs; Fabric compatibility documentation; Clear post-press care instructions; Ongoing quality control; Living SOP that evolves with learning. |