
DTF transfers have reshaped apparel decoration, offering designers a versatile path to vibrant, durable prints. From concept to finished garment, understanding the DTF transfer process helps you predict results and plan production. This guide explores what DTF printing involves, how DTF works, and the advantages over other methods such as DTF vs screen printing. With a focus on heat press DTF techniques, you’ll learn practical steps to achieve consistent, high-quality results. Whether you’re a hobbyist or a shop owner, mastering these fundamentals can boost efficiency and color vibrancy.
Direct-to-film printing opens up a world of film-based transfer options that work across a wide range of fabrics. This approach, sometimes called film-to-garment transfers, emphasizes the same core ideas—color robustness, detail retention, and a smooth hand—while using alternative terminology that aligns with search intent. By comparing this method to related processes in the textile printing landscape, you can choose between visuals, durability, and cost with confidence. In practical terms, the technology behind these transfers centers on a coated film, adhesive powders, and precise heat application, all executed with a compatible press.
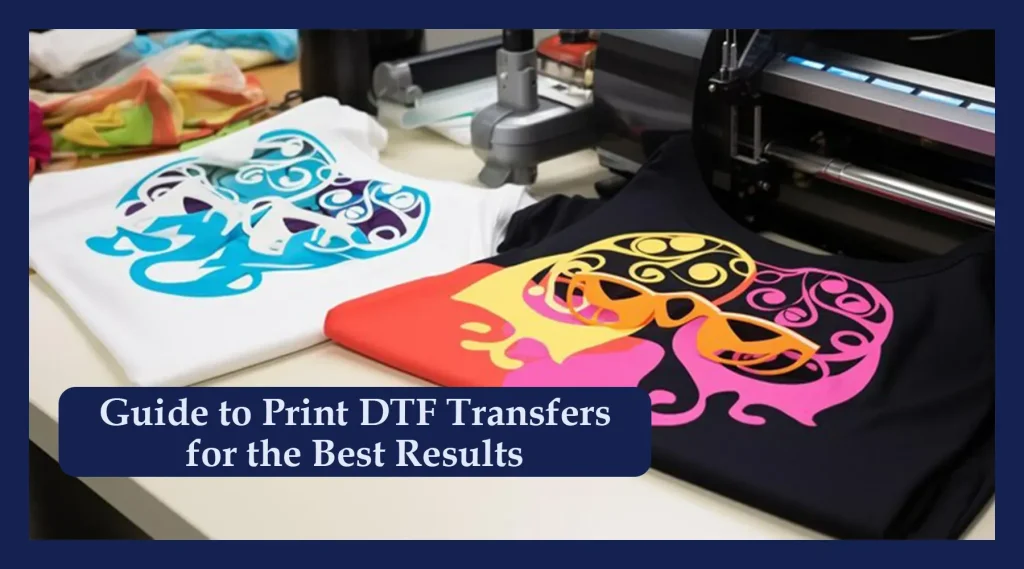
DTF Transfers: What They Are and How They Work
DTF transfers are direct-to-film prints that are created on a special PET film and later applied to fabrics using heat and pressure. The result is vibrant color, sharp details, and a soft hand feel that works well on both light and dark garments. This approach—referred to as DTF transfers—offers designers a flexible option for small runs and varied substrates, with less setup compared to traditional methods. By understanding the basics of the DTF transfer workflow, you can choose when this method is the best fit for a project and avoid common pitfalls.
From a high-level perspective, DTF printing starts with a design produced for a transfer film, followed by an adhesive powder application and curing before heat is applied to bond the ink to fabric. This process highlights how DTF works differently from direct-to-garment (DTG) printing, enabling bold colors and resilience across fabrics. When paired with proper heat pressing, the resulting image adheres securely while maintaining a comfortable feel on the garment.
DTF Printing vs Screen Printing: Pros, Cons, and Use Cases
DTF printing delivers a broad color gamut and detailed imagery with relatively simple setup, making it a strong option for complex designs and small to medium runs. In contrast, screen printing shines for large-volume orders with solid colors and simple designs, where setup costs can be amortized over many units. When evaluating DTF vs screen printing, consider substrate versatility, color fidelity on dark fabrics, and turnaround requirements to determine the most efficient method for a given project.
For many shops, the decision also hinges on workflow efficiency and scalability. DTF printing can streamline production for multiple colors and designs without needing separate screens, while screen printing may require more capital and time for color separations. Understanding the strengths and limitations of each method helps you select the right approach for your fabric types, order sizes, and quality expectations.
The DTF Transfer Process: From Design to Garment
This section outlines the end-to-end DTF transfer process, starting with design and preparation. Design files should be high resolution (300 dpi or higher) and color-managed to preserve intent, especially when printing on film for dark fabrics where a white underbase may be needed. By planning the printable area and heat press constraints, you set the stage for consistent results throughout the production run.
Next comes printing on DTF film, applying adhesive powder, and curing before transfer. Each step—film printing, powder adhesion, and curing—plays a critical role in image fidelity and adhesion strength. With proper handling and pre-press preparation, the garment is ready for the heat transfer, ensuring the final image adheres cleanly to the fabric and maintains color vibrancy over time.
Optimizing Heat Press Settings for DTF: Temperature, Time, and Pressure
Achieving consistent results with DTF transfers hinges on precise heat press settings. Typical guidelines suggest temperatures around 305–320°F (150–160°C) for about 12–15 seconds with firm, even pressure, but exact values depend on film and ink system specifics. Optimizing these variables is essential for reliable adhesion and edge-to-edge sharpness, especially when working with cotton, blends, or synthetics.
Beyond temperature and time, pressure uniformity and pre-press conditions affect outcome. Pre-warming the fabric to remove moisture and reduce wrinkles helps prevent misregistration, while tailoring settings for different fabrics minimizes edge peeling and cracking. Maintaining a documented SOP for heat press parameters ensures repeatability across batches and substrates.
Common Issues and Troubleshooting in DTF Transfers
Even with careful setup, issues such as ghosting, faint imagery, or misregistration can occur. Common culprits include insufficient powder adhesion, inadequate curing, or improper transfer temperatures. Systematic checks—verifying uniform powder coverage, confirming curing times, and validating press settings—help identify the root cause and guide corrective actions.
Color shifts, white underbase problems on dark fabrics, or edge peeling are signs to re-evaluate ink density, film compatibility, and pre- or post-processing steps. Reassessing color management, ICC profiles, and the chosen underbase strategy can restore brightness and opacity. Regular test runs on similar fabric swatches are a practical way to catch issues before batch production.
Post-Transfer Care and Durability of DTF Prints
Post-transfer care plays a key role in preserving vibrancy and longevity. Turn garments inside out for washing, use cold water, and avoid aggressive detergents during the first few washes. Following these guidelines helps maintain color brightness and prevents edge peeling, especially on blends and darker fabrics.
Durability across fabrics improves with proper curing and uniform heat application during transfer, as well as mindful post-care habits. DTF printing benefits from thoughtful fabric selection and consistent heat press practices, enabling long-lasting results that stand up to routine wear and laundering while preserving detail and opacity across substrates.
Frequently Asked Questions
What are DTF transfers and how does the DTF transfer process work?
DTF transfers are direct-to-film prints that are bonded to fabric with heat and pressure. The DTF transfer process starts with printing the design onto a specialized film, then applying an adhesive powder and curing before transfer. When heat and pressure are applied, the ink bonds to the garment, delivering vibrant color, fine detail, and a soft hand on light and dark fabrics.
How does the DTF transfer process compare to screen printing?
The DTF transfer process offers vibrant colors and complex multi-color designs with less setup than traditional screen printing, making it ideal for short- to mid-run jobs. Compared with screen printing, DTF transfers typically require less upfront equipment and can be used on a wider range of fabrics. For very large runs with simple designs, screen printing can be more cost-efficient.
What is heat press DTF and how should you set it up for best results?
Heat press DTF means using a heat press to transfer a DTF film image onto fabric. Follow the film and ink system guidelines, but typical settings are around 305–320°F (150–160°C) for 12–15 seconds with firm pressure. After transferring, allow cooling and peel the carrier film; perform any required curing to maximize adhesion and surface durability.
Which fabrics are best for DTF printing and how versatile is DTF printing across materials?
DTF printing works well on cotton, polyester, blends, and many other fabrics, offering strong substrate versatility. For dark fabrics, a white underbase or suitable underprint helps maintain brightness and opacity. Always pre-wash or pre-press fabrics and follow the supplier’s recommendations for best results.
What common issues occur with DTF transfers and how can you troubleshoot them during the DTF printing process?
Common issues with DTF transfers include ghosting, peeling, color shifts, and underbase problems. Troubleshooting focuses on consistent powder application, proper curing, correct heat press settings, and accurate color management with ICC profiles. Test on similar swatches before batch production to catch issues early.
What post-transfer care keeps DTF transfers durable on garments?
Post-transfer care for DTF transfers includes turning garments inside out, washing in cold water, and avoiding harsh detergents for the first few washes. Proper curing around transfer areas and following manufacturer guidelines help preserve color brightness and adhesion. With good post-care, DTF transfers stay durable through wear and washing.
| Topic | Key Points |
|---|---|
| What Are DTF Transfers? |
|
| How the DTF Process Works |
|
| Why Choose DTF Printing |
|
| Step-By-Step DTF Transfer Process |
|
| Materials and Equipment You’ll Need |
|
| Tips for Flawless DTF Transfers |
|
| DTF Transfers vs. Other Methods |
|
| Common Issues and Troubleshooting |
|
| Best Practices for Consistent Results |
|
Summary
DTF transfers offer a flexible, high-quality pathway to vibrant printed garments across a broad range of fabrics. This descriptive overview highlights how the DTF transfer process works, its advantages, and practical tips to achieve consistent results from design and printing to curing, transferring, and post-care. By following best practices and selecting appropriate materials and heat-press settings, you can produce professional-grade results for single custom tees or small to mid-size print runs, while understanding how DTF transfers compare to screen printing, DTG, and sublimation to choose the best method for each project and substrate.