
Embroidered patches vs iron-on patches is a comparison that matters to hobbyists, crafters, and professionals who rely on patches to brand, personalize, or customize textiles. In this quick intro, we explore how this choice can affect durability, appearance, maintenance, and cost. We’ll cover the patches pros and cons, best uses for patches, and practical tips so you can decide which method fits your fabric. You’ll also find guidance on how to apply embroidered patches and how to apply iron-on patches to support DIY and production decisions. From jackets to backpacks, understanding these options helps you achieve a durable, stylish finish that matches your care routine.
From an LSI-friendly angle, the discussion can be framed as sewn patches versus heat-activated backing, with related terms like embroidered badges and adhesive-backed appliques. These alternative descriptors help search engines connect concepts such as durability, care, and application methods to the same core comparison. Whether you call them sewn patches or iron-on designs, the practical choices—attachment method, fabric compatibility, and maintenance—remain central. Exploring these variants gives readers a flexible vocabulary to evaluate products and plan projects without getting hung up on terminology.
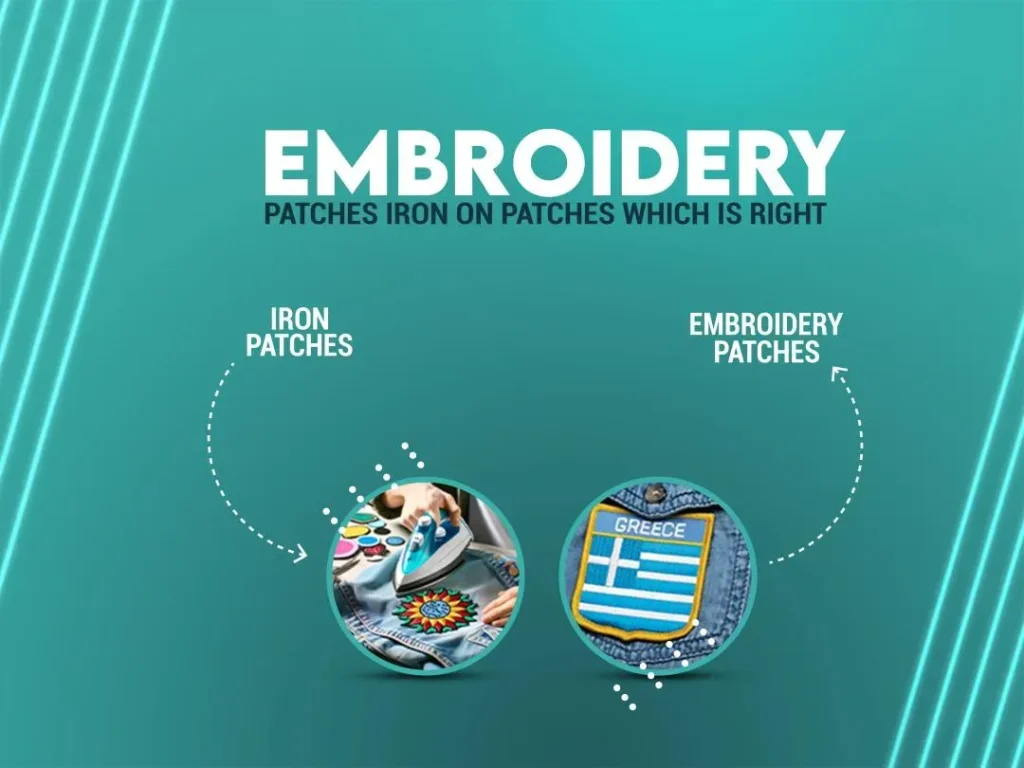
Embroidered patches vs iron-on patches: a clear side-by-side comparison
Embroidered patches and iron-on patches are built from different foundations: embroidery involves stitching thread onto a fabric backing, often with a merrowed edge for a neat, durable finish. Iron-on patches rely on a heat-activated adhesive backing that bonds to fabric when warmed with an iron or heat press. The result is two distinct attachment experiences—permanent stitching versus quick, heat-assisted bonding—each with its own look, feel, and performance profile.
From an aesthetics and durability standpoint, embroidered patches typically convey a premium, textured appearance and are designed to withstand frequent washing when sewn on. Iron-on patches offer convenience and speed, enabling rapid customization without sewing skills. However, this convenience can come at the cost of long-term durability and resistance to aggressive laundering or high heat.
When choosing between them, consider your project goals, fabric type, and how you’ll care for the garment. If you want a long-lasting, high-quality result on sturdy fabrics, embroidery with sewing is often preferred. If you need fast deployment for events, prototypes, or budget-conscious runs, iron-on patches are a practical option. Both types can be part of a broader strategy, depending on the use case and care routine.
Durability and care: which patch lasts longer under washing and wear
Durability hinges on attachment method and how garments are cared for. Sewn embroidered patches become a permanent part of the fabric, with stitching that resists peeling and fraying when backed by a solid fabric like denim, canvas, or twill. Their longevity is closely tied to stitch density, thread quality, and proper seam construction, making them well-suited for items that endure frequent washing and rugged use.
Iron-on patches can perform well initially but may loosen at the edges after repeated washings or exposure to high heat. The adhesive bond can degrade on some fabrics, especially textured or synthetic blends, and on garments that are tumble-dried aggressively. To maximize life, follow fabric care guidelines, avoid harsh detergents, and consider reinforcing with a seam if the garment will see heavy wear.
Care strategies matter for both types. For embroidered patches, turning garments inside out before washing and selecting gentle cycles helps preserve thread color and fabric integrity. For iron-on patches, air-drying or low-heat drying and testing a small area beforehand can prevent adhesion failures and distortion, ensuring the patch remains securely bonded longer.
Best uses for patches: matching patch type to garment and purpose
Best uses for embroidered patches emphasize longevity and a premium appearance. They excel on uniforms, team gear, or jackets where the patch will be washed frequently, and where you want durable color fidelity and a tactile, high-quality look. Embroidered patches are ideal when a secure, permanent attachment is essential and the project calls for intricate stitching or subtle texture.
Best uses for iron-on patches center on speed, cost efficiency, and temporary to semi-permanent branding. They’re well-suited for event merchandise, quick prototypes, or DIY projects where quick turnaround matters. Iron-ons work best on fabrics that tolerate heat and are not prone to significant shrinkage, and they’re convenient for testing a design before committing to sewn patches.
A balanced approach can also work well: combine methods by sewing embroidered patches for durability on key pieces while using iron-on patches for early deployment or trials, then switch to sewn patches if long-term wear is anticipated. Always assess fabric type, garment care, and budget when deciding which patch type to prioritize.
How to apply embroidered patches: sewing-focused techniques and tips
Applying embroidered patches through sewing offers the strongest, most durable attachment over time. Start by positioning the patch precisely, securing it with pins or fabric chalk, and protecting delicate threads with a pressing cloth. A straight or zigzag stitch along the merrowed edge helps anchor the patch with a clean boundary and reduces the risk of edges lifting over time.
When stitching, choose a dense stitch pattern to ensure the boundary remains secure on heavier fabrics. Consider adding interior stitches, like a cross-stitch or running stitch, to minimize wrinkles and improve stability. After sewing, gently press to set the stitches and inspect for loose threads, trimming any excess to maintain a neat finish. For machine sewing, a stitch length around 2.0–3.0 mm works well on sturdy fabrics; lighter fabrics may benefit from a shorter stitch to minimize puckering.
For best results, match thread color to the patch and garment, and use a stabilizer or backing if needed to prevent fabric distortion. Reading the patch’s backing material and following it’s recommendations can further reduce stitching errors and ensure a professional, durable result.
How to apply iron-on patches: heating-based bonding and finishing touches
Applying iron-on patches centers on safe, controlled heat bonding. Check the fabric’s heat tolerance and the patch backing before starting, then preheat your iron to the recommended setting (often cotton or polyester). Place a clean cloth or parchment over the patch to protect the surface and distribute heat evenly, and press firmly with steady pressure for the instructed duration.
Avoid moving the iron during bonding; keep it in place to allow the adhesive to set. After bonding, allow the patch to cool completely before testing adhesion. If the edges lift, reapply heat with firm pressure. For extra durability on high-wear items, you can reinforce with a tight zigzag stitch around the edge after the patch has bonded.
Be mindful of fabric types that may not tolerate heat well, such as delicate synthetics or fabrics prone to shrinking. Always test a small area first and follow the manufacturer’s heat recommendations. If you plan to launder the garment frequently, consider a secondary sewing around the edge for long-term security.
Cost, customization, and choosing the right patch for your project
Cost considerations often reflect labor and material quality. Embroidered patches tend to have higher per-patch costs, especially for complex designs or large patches, due to the skilled production involved. Iron-on patches are typically cheaper and faster to produce, making them attractive for bulk orders, quick-turn projects, or tight budgets.
Customization options are broad for both types, including size, shape, color, and backing options. Embroidery often yields richer color depth and texture, while iron-ons can be advantageous for rapid prototyping or temporary branding. Availability can vary by supplier, so planning ahead helps ensure you get the backing and finish you want.
When deciding, weigh durability, use case, and care requirements against cost. If you expect frequent washing or heavy wear, investing in sewn embroidered patches may provide better long-term value. For temporary designs, event-focused campaigns, or fast-market testing, iron-on patches offer a cost-efficient, flexible solution.
Frequently Asked Questions
What are the main pros and cons of embroidered patches vs iron-on patches?
Embroidered patches vs iron-on patches each offer distinct benefits. The pros of embroidered patches include durability when sewn, a premium textured look, colorfast threads, and clean merrowed borders; the cons are higher cost and the need for sewing for a secure attachment. Iron-on patches provide quick, beginner-friendly application and lower upfront cost, but their durability can be lower and the adhesive may peel with washing or heat.
What are the best uses for patches when choosing between embroidered patches vs iron-on patches?
Embroidered patches are ideal for uniforms, high-end apparel, and long-term branding due to durability and a premium appearance. Iron-on patches suit events, prototypes, quick personalization, and items where sewing isn’t practical. Consider fabric type and care, and test patches on a small area before full application.
How to apply embroidered patches
Applying embroidered patches can be very durable when sewn on. Practical steps: position the patch, pin or chalk placement, place a protective cloth, sew around the merrowed edge with a zigzag stitch (2.0–3.0 mm stitch length on sturdy fabrics), optionally add an inner running stitch for security, then press to set and inspect for loose threads.
How to apply iron-on patches
For iron-on patches, check fabric heat tolerance and preheat the iron to the recommended setting. Place a clean cloth over the patch, press firmly with steady pressure for 15–30 seconds without moving, and allow to cool before testing adhesion. For extra durability, sew around the edge after bonding.
Which patch type is more durable for frequent washing: embroidered patches vs iron-on patches?
Generally, embroidered patches that are sewn on tend to be more durable for frequent washing than iron-on patches, whose adhesive can degrade over time. To maximize lifespan, turn garments inside out, use gentle cycles, avoid high heat, and consider stitching around the edge if long-term durability is required.
What factors affect cost and availability when comparing embroidered patches vs iron-on patches?
Cost and availability are influenced by design complexity, patch size, color count, backing type, and whether sewing or heat bonding is used. Embroidered patches typically cost more due to stitching and setup, while iron-on patches are cheaper and faster to produce, especially in bulk. Lead times and customization options also vary by supplier.
| Topic | Summary | Practical Tips |
|---|---|---|
| Patch types | Embroidered patches are stitched to a fabric backing with optional heat-activated adhesive; iron-on patches use heat-activated adhesive backing to bond to fabric. | Consider sewing embroidered patches for durability; test iron-on on fabric for heat tolerance. |
| Pros of embroidered patches | Durable, textured appearance with merrowed edges; colorfast designs; permanent attachment when sewn. | Sew on sturdy fabrics like denim, canvas, twill; ensure fabric can handle washing without color bleed. |
| Cons of embroidered patches | Requires more time and sewing skill; higher cost for complex designs; risk of puckering on delicate fabrics. | Plan for sewing or higher per-patch cost; test on delicate fabrics. |
| Pros of iron-on patches | Fast, beginner-friendly; no sewing required; good for quick customization and prototyping. | Check fabric heat tolerance; follow patch backing instructions; test bond on a small area first. |
| Cons of iron-on patches | Adhesive can degrade with washing or high heat; not all fabrics bond well; dry cleaning or heavy tumble drying can shorten life. | Consider later sewing for durability; avoid high-heat care methods when possible. |
| Best uses for embroidered patches | Longevity and premium look for uniforms, high-end apparel; secure, long-term attachment; showcases intricate stitching. | Sew on sturdy fabrics; if using iron-on backing, ensure fabric tolerates heat and test first. |
| Best uses for iron-on patches | Quick customization, temporary or semi-permanent use; great for events, prototypes, casual wear. | Choose fabrics that tolerate heat; test before full application. |
| How to apply embroidered patches (sewing-focused) | Position and protect; sew around merrowed edge with dense stitches; consider inner cross-stitch; press to set; use stitch length 2.0–3.0 mm on sturdy fabrics. | Pins/chalk for placement; use protective cloth; test on fabric scraps first. |
| How to apply iron-on patches | Check fabric heat tolerance; preheat iron; place patch with cloth; press 15–30 seconds; cool to test; reseat edges if needed; sew around for extra durability. | Follow manufacturer heat settings; avoid steam unless allowed; test on hidden area first. |
| Durability and care considerations | Sewn embroidered patches typically outlast iron-ons under frequent washing; care by turning inside out and using gentle cycles. | Avoid high heat and harsh detergents; follow garment care guidelines. |
| Cost, availability, and customization | Embroidered patches are generally more expensive due to labor; iron-ons are cheaper and faster for bulk orders; both offer size, color, shape, and backing options. | Budget planning matters; compare per-patch costs for complex designs. |
| Choosing between embroidered vs iron-on patches | Base decision on goals: longevity and premium look vs speed and cost; fabric type and care influence choice; combining methods is possible. | Assess use-case; test on fabric; plan for long-term durability if needed. |
| SEO-friendly content integration tips | Weave related keywords naturally (e.g., embroidered vs iron-on patches, patches pros and cons, best uses for patches) to improve search visibility. | Use bullet points, short tips, and visuals to boost readability and dwell time. |
Summary
Conclusion: Embroidered patches vs iron-on patches each offer distinct advantages and trade-offs. By understanding their differences, you can choose the option that best matches your fabric, use case, and care routine. Embroidered patches deliver enduring quality and a premium appearance when sewn, making them ideal for durable uniforms and high-end apparel. Iron-on patches provide quick, budget-friendly customization with simpler installation, suitable for temporary branding, fast prototypes, or casual wear. Whether you’re outfitting a sports team, personalizing a backpack, or crafting a unique fashion statement, the right patch type—backed by informed choices about how to apply embroidered patches or how to apply iron-on patches—will help you achieve professional-looking results that last.