
Getting UV DTF transfer settings right is essential for vibrant, durable prints that stand up to washing and wear. The three levers—speed, heat, and time—shape how the ink bonds to fabric, how crisp the image looks, and how long it lasts. A solid grasp of these principles helps you predict outcomes across different textiles and designs. A practical starting point is to balance DTF transfer speed with adequate dwell time and steady heat to prevent ghosting. As you test, track results for color saturation and adhesion so you can reproduce reliable, shop-floor-ready outcomes.
In practice, think of these parameters as adjustable levers for UV-curable ink transfers rather than fixed rules. DTF transfer heat settings will vary by fabric, and testing helps map the sweet spot for adhesion and edge clarity. Likewise, the duration the press spends on the fabric—DTF transfer time—shapes curing and bond strength, especially on blends and darker fabrics. By adopting a latent semantic approach, you can connect terms like UV-curable inks, transfer film, substrate texture, and curing kinetics to build a scalable, repeatable workflow.
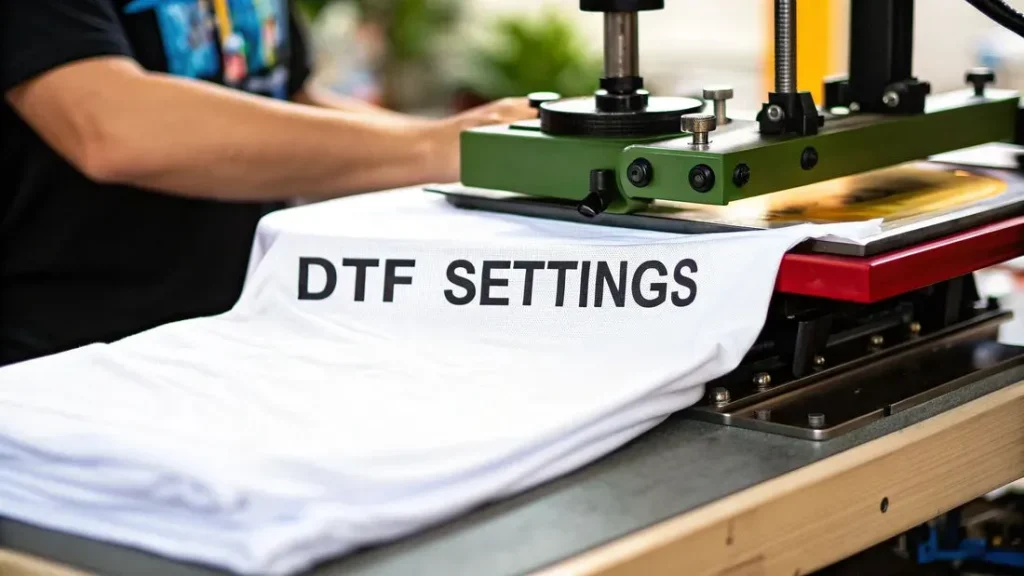
Mastering UV DTF transfer settings for consistent results
Understanding UV DTF transfer settings is the first step to achieving consistent, high-quality prints. The three levers—speed, heat, and time—must be balanced with the fabric and ink system to control color density, edge sharpness, and adhesion. When you adjust these factors together, you’ll reduce surprises like ghosting and color migration and instead produce predictable outcomes across multiple runs.
Think of UV DTF transfer settings as a repeatable recipe. You start with a baseline, test on representative fabrics, and then refine in small increments. By documenting how speed interacts with dwell time and temperature, you create a toolkit you can reuse for different garments and designs, ensuring that your results remain vibrant and durable over time.
DTF transfer speed: finding the right balance for different fabrics
DTF transfer speed isn’t just about moving quickly; it defines how long the transfer film stays in contact with the fabric. A faster pace reduces dwell time and can save production time, but it may compromise ink saturation and adhesion if heat and dwell are not adjusted accordingly. Conversely, slower speeds improve color density but can lead to over-inking or edge halos on fine details.
Starting points matter. Begin with a moderate speed that provides deliberate, not sluggish, transfer and then tweak in small steps. Watch for ghosting on high-contrast edges when increasing speed, which often signals the need for adjusted heat or dwell time to preserve sharpness.
Heat, pressure, and UV DTF curing time: how temperature drives adhesion
Heat and pressure drive the curing and bonding of UV DTF inks to fabrics. The correct heat helps the ink cure without scorching or distorting the material. Too little heat can weaken the bond, especially on stretch fabrics, while too much heat or pressure can cause damage to fine details.
A practical starting range is around 300–320°F (150–160°C) with medium pressure, then you can fine-tune based on fabric weight and ink formulation. The UV DTF curing time will vary with material and film, so monitor the bond strength and edge integrity as you adjust heat and pressure to avoid scorching or ink bleed.
DTF transfer time: dialing in dwell duration for different fabrics
Time, or dwell, is how long the transfer sits under heat and pressure. The right dwell time ensures proper curing and bonding without compromising fabric hand feel. Time interacts with heat and speed, so a longer dwell can allow lower printhead energy but may risk overheating certain inks or fabrics if the system isn’t calibrated.
Begin with a baseline dwell of around 10 seconds at your chosen temperature, then adjust in small steps. Lighter fabrics may require shorter dwell, while heavier, dense fabrics may tolerate or require longer dwell to achieve complete saturation and bond.
Substrates, films, and inks: material influences on color, edge sharpness, and adhesion
The choice of substrate and transfer film dramatically affects how the image sits on the fabric and how much saturation you’ll achieve at a given setting. Different fabrics—cotton, polyester, blends, or dark materials—absorb UV-curable inks differently and respond uniquely to heat and pressure.
Fiber type, whiteness, weave, and pre-treatment all shift your ideal range for heat and dwell. If you’re using a carrier-rich transfer film, you may see crisper edges but should test to prevent film residue or edge lifting. Fine-tune by cross-checking how the substrate responds to UV DTF transfer settings and adjust DTF transfer heat settings accordingly.
A practical, repeatable UV DTF printing workflow: testing, documenting, and scaling
A repeatable workflow starts with a small, representative test. Build a master sheet that records final speed, heat, and time values for each fabric type and ink set. This practice makes it easier to scale production without guessing, and it supports consistency across batches.
Adopt a structured testing routine: print swatches, cure and press once to verify color accuracy and bond strength, then adjust speed to control saturation. Document every variable—fabric type, film, printer model, and final UV DTF transfer settings—so you can reproduce results or scale to new fabrics with confidence.
Frequently Asked Questions
What are UV DTF transfer settings and how do they influence UV DTF printing quality?
UV DTF transfer settings are the combination of DTF transfer speed, heat, and time used when pressing UV‑curable inks onto fabric. In UV DTF printing, these levers determine ink saturation, edge sharpness, and adhesion. Start with a baseline: moderate speed, 300–320°F (150–160°C), dwell time of 10 seconds, and medium pressure, then test across fabrics and transfer films and adjust in small steps to improve bonding and color accuracy.
How does DTF transfer speed affect color density and edge sharpness in UV DTF transfer settings?
In UV DTF transfer settings, speed (DTF transfer speed) controls how long the transfer stays on the fabric. A faster speed reduces dwell time, which can lower ink saturation and adhesion if heat is not adjusted; a slower speed increases contact time, improving color density but risking edge halos on fine details. Start with a moderate speed and watch for ghosting on high‑contrast edges, then fine‑tune heat and time accordingly.
How should you set DTF transfer heat settings and pressure to avoid scorching in UV DTF transfer settings?
Heat and pressure drive curing and bonding of UV DTF inks. A practical starting point is 300–320°F (150–160°C) with medium pressure; dwell 8–15 seconds depending on fabric. Too much heat or pressure can scorch, especially on dark or dense fabrics; too little can leave weak bonds. Test on target fabrics and adjust gradually, keeping heat, dwell, and pressure balanced.
What is the role of DTF transfer time (dwell) in achieving durable UV DTF curing time?
DTF transfer time, or dwell, is how long the transfer sits under heat and pressure and it directly affects curing and bond strength. Start with a baseline dwell of 10 seconds at your chosen temperature, then adjust in 2-second steps. Longer dwell can improve cure on heavier fabrics but may risk scorching on delicate materials; shorter dwell suits lightweight fabrics.
What steps should I take to optimize UV DTF transfer settings across different fabrics and films?
Follow a practical workflow: prepare bold-contrast artwork, print small test batches and a baseline of moderate speed, 300–320°F (150–160°C), and 10 seconds of dwell with medium pressure. Print swatches with slight variations in speed, heat, and time; evaluate adhesion, color accuracy, and edge sharpness; narrow to 2–3 best settings and verify across fabrics; finally document the final UV DTF transfer settings per fabric and film.
What are common UV DTF transfer settings troubleshooting tips for issues like ghosting or peeling?
Common troubleshooting steps include adjusting speed, dwell, and heat. Ghosting or blurry edges often result from too fast a speed or insufficient heat—reduce speed, increase dwell, and ensure transfer film carriers are clean and aligned. For peeling after washing, verify cure time and adhesion; consider a longer dwell or slightly higher temperature, and check press calibration and fabric saturation.
| Topic | Summary |
|---|---|
| UV DTF transfer settings (definition) | Combination of speed, heat, and time used when pressing UV DTF transfers; influence ink saturation, color accuracy, edge sharpness, and adhesion; depend on media type, transfer film, ink system, and press; testing is essential. |
| Speed | Defines how fast the press moves and how long the transfer sits on the fabric. A faster speed reduces dwell time but may reduce ink saturation and adhesion if temperature and dwell time aren’t adjusted. A slower speed increases contact time and can improve color density but may cause over‑inking, bleeding, or edge halos on fine details. Start with a moderate speed and adjust in small increments. Watch for ghosting or blurring on high‑contrast edges when speeding up. If colors are dull, reduce speed slightly and increase dwell time or adjust heat. |
| Heat and pressure | Heat and pressure drive curing and bonding of UV DTF inks. Correct heat helps the ink cure without scorching or distorting the fabric. Too little heat can leave the bond weak; too much heat or excessive pressure can scorch or distort details, especially on dark or dense fabrics. Practical starting range is around 300–320°F (150–160°C). Dwell (time) is typically 8–15 seconds. Aim for medium pressure to avoid ink squeeze and color shifts. |
| Time (dwell) | Dwell time is how long the transfer sits under heat and pressure. Longer dwell can reduce the needed printhead energy and lower scorching risk, but can cause overheating of inks or fabrics if the system isn’t calibrated. Start with a baseline dwell of 10 seconds at the chosen temperature, then adjust in 2‑second steps. For delicate fabrics reduce dwell slightly; for heavier fabrics or dense prints, increase dwell by 2–4 seconds while monitoring scorching or stiffness. |
| Substrates, films, and inks considerations | Results depend on the substrate and film used. Lighter fabrics may need slightly higher heat and shorter dwell to avoid dye migration while achieving bright whites and crisp edges. Darker fabrics may require longer dwell times or higher temperatures for ink adhesion and color depth. A transfer film with a strong carrier can yield sharper edges but test to avoid film residue or edge lifting. Ink system compatibility also affects saturation and curing. |
| Best‑practice workflow for UV DTF transfer settings | 1) Prepare a small test strip on a representative fabric with a sample image that includes solids, fine lines, and area fills. 2) Start with a baseline: moderate speed, 300–320°F (150–160°C), dwell of 10 seconds, medium pressure. 3) Print swatches with slight variations in speed, heat, and time to compare results. 4) Evaluate adhesion, color accuracy, and edge sharpness for ghosting, bleeding, or edge issues. 5) Narrow to 2–3 best settings across fabrics to verify consistency. 6) Perform a final test on the production fabric across several cycles. 7) Document the final UV DTF transfer settings as the standard recipe for future jobs. |
| Practical tips for optimizing UV DTF transfer settings | Always test prints; use consistent substrates; calibrate your press (heat platen, time controller, pressure) for accuracy and repeatability; record environmental factors like humidity and ambient temperature; maintain equipment with regular checks; consider pre‑treatment for fabrics to improve ink uptake and hand feel. |
| Troubleshooting common issues with UV DTF transfer settings | Fading colors or dull whites: increase dwell time slightly or raise temperature a few degrees while keeping pressure constant. Ghosting or blurry edges: reduce speed, increase dwell, or ensure film carriers are clean and aligned; prevent fabric movement during pressing. Cracking or stiffness: reduce heat by 5–10°F (3–5°C) and shorten dwell time; check for excessive ink loading on dense areas. Peeling after washing: review post‑press cure time and ensure adequate heat transfer; consider longer dwell or slightly higher temperature if the ink bond is insufficient. Uneven saturation on dark fabrics: adjust white base or underprint strategy and verify press calibration. |
| A practical, repeatable workflow you can adopt | Step 1: Prepare artwork with bold contrast for UV DTF inks. Step 2: Print a small test batch on the chosen fabric using baseline UV DTF transfer settings. Step 3: Cure and press once to check color accuracy and bond; adjust speed to control ink saturation. Step 4: Create a production ready master sheet with final speed, heat, and time values per fabric type. Step 5: Build a simple job checklist including fabric type, ink set, film, printer model, and final UV DTF transfer settings used. |
| Baseline starting values | Starting point to begin optimization: speed moderate, temperature around 300–320°F (150–160°C), dwell time 10 seconds, and medium pressure. Use these as the baseline across fabrics and adjust in small increments based on observed results. |
Summary
UV DTF transfer settings shape your results by controlling speed, heat, and time to influence bonding, color saturation, and durability. A systematic approach to testing, documentation, and refinement across fabrics and films helps you achieve consistent, vibrant transfers with strong adhesion and wash resistance. Following a structured workflow reduces variability, improves production efficiency, and delivers professional results with UV DTF transfer settings.