
3D Embroidered Stitches open a world of texture and dimension, turning flat fabrics into lifelike art. As a practical guide for embroidery stitches for beginners, it sits within the broader realm of 3D embroidery techniques. This dimensional embroidery tutorial introduces simple padding and layering that build height without overwhelm. From tools to techniques, this hand embroidery stitches guide offers practical embroidery stitches for texture and dimension. Begin with a small motif to practice layering and padding, then build confidence toward more complex projects.
Beyond that specific term, the concept can be described as dimensional embroidery, a collection of techniques that add raised texture and sculptural form to fabric. Following LSI principles, related terms such as dimensional embroidery, raised-stitch motifs, padded layering, textured stitching, and three-dimensional surface art help connect the concept. This approach mirrors how designers describe similar techniques across textiles, crafts, and hoop art, reinforcing meaning without relying on a single label. By focusing on padding, layering, and height with common stitches, readers will recognize the technique as versatile across garments, decor, and accessories.
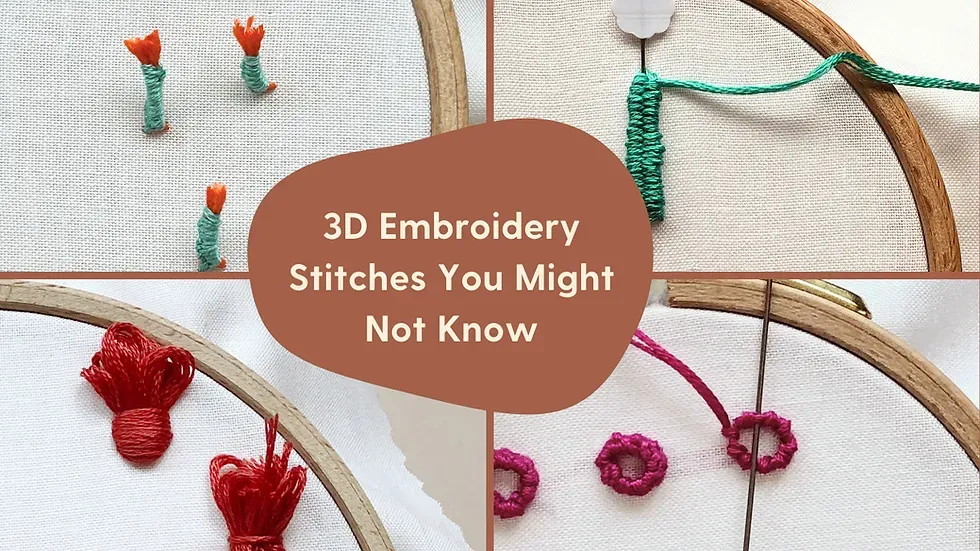
3D Embroidered Stitches: Techniques to Build Realistic Texture
In a dimensional embroidery tutorial style, 3D Embroidered Stitches build height by stacking thread, padding, and layered stitches to create lifted petals, leaves, and shapes. This approach helps move from flat fabric to sculptural texture, using simple tools and common stitches to begin your journey into 3D embroidery techniques. Beginners can see immediate results when they plan layers and choose threads that hold their shape.
Start with a clear plan: outline your design, decide where the height should peak, and think in layers from back to front. Practice padding behind the embroidery area, sample ground stitches, and then add raised elements with satin, bullion knot, or French knot variations. This method aligns with the dimensional embroidery tutorial mindset: practice small motifs, secure endings, and gradually increase complexity while keeping stitches practical.
Embroidery Stitches for Beginners: A Simple Path to Depth
For beginners, focusing on accessible stitches makes 3D effects achievable. The goal is to reveal depth using simple stitches such as satin, backstitch, and French knots, then layering them with padding. This aligns with the embroidery stitches for beginners guidance, helping you build confidence before tackling complex textures.
As you practice, apply color strategically—lighter shades forward, darker hues recede—to enhance dimension. The process mirrors the hand embroidery stitches guide approach, emphasizing foundational stitches and secure finishing while you explore layering techniques that create shadow and lift in your designs.
Layering and Padding in a Dimensional Embroidery Tutorial
Layering is the core of dimensional embroidery. In this tutorial-style approach, you’ll start with a light padding behind the fabric and add height in increments. Use ground stitches to establish shape, then build up with extra thread, padding or felt behind high areas to create robust dimension. This keeps your work aligned with the dimensional embroidery tutorial mindset while staying accessible for beginners.
Consider how color height and spacing affect depth. Work from the back layer toward the front, securing each level before moving on. Practicing this layering strategy with simple shapes—flowers, leaves, or tiny characters—helps you translate the concept into practical embroidery stitches that read as dimensional rather than flat.
Tools, Materials, and Workspace for 3D Embroidery Techniques
A stable hoop, a suitable stabilizer, and threads that hold shape are the foundation of 3D embroidery techniques. The base content highlights options like cotton floss, cotton perle, or silk, plus needles that fit your fabric weight. With a proper setup, your layers stay crisp as you build height.
Organize your workspace and practice with scraps to refine tension, padding placement, and stitching sequence. A dedicated space makes it easier to experiment with the recommended stitches—satin stitches, bullion knots, and French knots—without worrying about ruining a larger project. This practical approach keeps embroidery enjoyable while you master the mechanics behind dimensional texture.
Hand Embroidery Stitches Guide: From Satin to Bullion for Dimension
This hand embroidery stitches guide focuses on the core stitches that create 3D effects: satin, bullion knot, pistil stems, French knot variations, cast-on, whipped stitch, and runner stitch. When you pair these with padding and layering, each stitch contributes lift and texture to your design. This foundational knowledge supports your journey into dimensional embroidery.
Experiment with combining stitches to mimic natural forms—flower centers with bullion or seed-like textures with French knots. The key is planning and consistency so the height remains even as you cover padding and transition between zones. Use this guide to organize practice sessions that steadily increase complexity while keeping results predictable.
Practical Projects: Quick 3D Flowers to Practice Practical Embroidery Stitches
A small 3D flower is a perfect starter project to apply practical embroidery stitches. Trace a simple shape, outline petals with satin stitches, then bolster the center with padding and a bullion knot or French knot for a raised focal point. This project mirrors the beginner-friendly approach and helps you experience how layering and padding influence depth.
As you complete this motif, assess tension, alignment, and how color choices enhance dimension. Move on to a few more petals or add leaf shapes to practice layering at different heights. Repeating similar motifs builds muscle memory for the exact angles and heights you want to achieve, aligning with a practical embroidery stitches mindset where repetition leads to confidence.
Frequently Asked Questions
What are 3D Embroidered Stitches and how can beginners start with 3D embroidery techniques?
3D Embroidered Stitches are stitches that build height and texture, creating raised designs that pop from the fabric. For beginners, use a stable hoop, light padding behind the embroidery area, and simple base stitches like satin stitch to establish the shape. Practice layering in small steps and always secure threads to prevent flattening—this aligns with embroidery stitches for beginners.
Which embroidery stitches for beginners are most effective when working with 3D Embroidered Stitches?
The best options include satin stitch with padding for the ground layer, bullion knots for raised centers, French knots for buds, and the cast-on stitch for voluminous petals. Use light padding and layer the stitches to build height, practicing on small motifs to gain confidence—perfect for embroidery stitches for beginners.
How can I map depth in a dimensional embroidery tutorial using 3D Embroidered Stitches?
Start with a simple sketch marking where height should be greatest. Add a light padding layer behind the embroidery, choose colors that push forward (lighter hues) and recede (darker hues), and work from the back layer to the front, layering gradually. Secure ends carefully as you progress.
What does a hand embroidery stitches guide suggest for achieving consistent 3D texture?
A hand embroidery stitches guide emphasizes even tension, a stable backing, and deliberate padding. Combine stitches such as satin stitches, bullion knots, and French knots with padding to keep forms raised and defined.
What are practical embroidery stitches for building dimension, and how should I use them?
Practical embroidery stitches for dimension include satin stitch with padding, cast-on for volume, and whipped or runner stitches to finish edges. Use a stiffer stabilizer, work in layers, and plan color transitions to heighten depth.
Can you share a simple beginner project using 3D Embroidered Stitches to practice dimensional texture?
Yes—a small 3D flower is a good starter. Draw or trace a shape, outline with base satin stitch, add a padded center (small circle of padding or compact satin stitches), then build the petals with additional satin stitches in layers, finishing with bullion or French knots for the center and secure threads.
| Aspect | Key Points |
|---|---|
| Definition |
|
| Why They Matter |
|
| Tools & Materials |
|
| Key Techniques |
|
| Planning & Transfer |
|
| Beginner Project |
|
| Advanced Techniques |
|
| Practical Tips |
|
| Common Challenges |
|
| Maintenance & Finish |
|
| Creativity & Expression |
|
Summary
3D Embroidered Stitches open a world of texture and storytelling that is accessible to beginners and richly rewarding for experienced stitchers. By embracing layering, padding, and a handful of essential stitches, you can craft projects with genuine dimensional impact. Start with simple motifs, practice core techniques, and gradually add more advanced textures to push your creativity further. With patience and practice, your fabric will gain depth and tactile interest, turning ordinary pieces into art that pops off the surface.