
Screen printing at home offers a flexible, affordable way to bring your designs to life with hands-on control, enabling you to experiment with textures, layering, and colorways on demand, and it makes it easier to iterate quickly while keeping your creative momentum. Whether you’re pursuing DIY screen printing as a hobby or a small business, you can tailor each print from concept to final product, selecting fabrics, inks finishes, and textures that reflect your brand while keeping production personal, hands-on, and adaptable to new ideas. Starting with essential screen printing supplies and a dedicated home screen printing setup helps you build a clean, repeatable workflow, reduces setup time between projects, minimizes waste by organizing inks, screens, and registration tools in a logical, accessible way, and establishes a reference for future work. As you learn how to screen print shirts at home, you’ll discover the key steps in design prep, exposure, ink mixing, pattern alignment, curing, post-cleanup, and process refinement, all aimed at producing consistent results across runs and different substrates. With the screen printing basics in mind and a tidy, ventilated workspace, you’ll develop durable, vibrant prints, build confidence through practice, document iterations for future reference, and position your home studio to scale from single-color experiments to more complex, multi-color projects.
Screen printing at home: Planning your DIY workspace for success
Creating a conducive, safe workspace is the first step in screen printing at home. Choose a dedicated area with good ventilation, a solid work surface, and enough room to lay out screens, inks, and a drying rack. A stable jig or small press helps keep garments aligned, reducing misprints and wasted ink. This foundation sets up your home screen printing setup for reliable, repeatable results that you can scale over time.
Adopt a phased approach to building your kit. Start with a basic DIY screen printing package—several screens, a dependable squeegee, a couple inks, and a straightforward curing method. As you gain experience, you can add a washout area, a small exposure unit, or specialty items like opaque inks. Keeping a simple inventory helps you manage space and time, anchoring your home screen printing workflow in practical, affordable steps.
Choosing and organizing screen printing supplies for a steady workflow
Successful at-home projects begin with smart investment in screen printing supplies. Rather than buying everything at once, assemble a practical starter kit that covers basic needs: screens, squeegees, inks, emulsion, and a curing method. This deliberate approach aligns with DIY screen printing principles and keeps your budget under control while you learn.
Organize by function and workflow: separate screens by mesh count, store inks and emulsions in a cool, dry place, and maintain a washing station for quick cleanup. Start with a small set of plain garments to maximize contrast and registration, and gradually expand to more colors and fabrics as your home screen printing setup matures. This measured growth follows screen printing basics and helps you stay productive.
Registration and design prep for accurate prints
Registration is the key to crisp, aligned prints. Beginners often wrestle with misregistration, but practice, patience, and a few registration marks go a long way. Use corner pins, a simple jig, or a fixed frame to keep textiles flat and vertically aligned. Mastery of registration helps you achieve consistent results across runs and projects.
Prepare designs for stencil production by separating colors and creating dedicated stencils for each layer. For beginners, starting with a single-color print is the easiest path to building confidence. If you’re learning how to screen print shirts at home, aim for bold lines and high contrast that translate well with a basic setup while you refine registration and ink flow. This approach embodies the screen printing basics in practice and builds a solid foundation for color work later.
The step-by-step process: coating, exposing, and printing
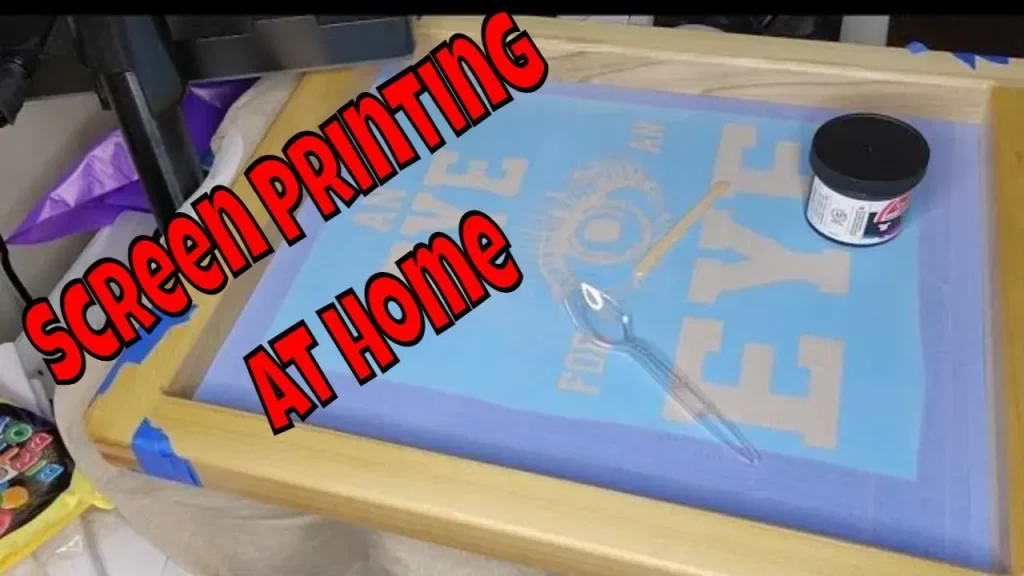
Coat the screen with emulsion in a dim, ventilated area, then let it dry away from dust. Once dry, place your design on the coated screen and expose it to your light source according to the emulsion’s instructions. After exposure, wash out the non-image areas to reveal your stencil. This sequence is the heart of the screen printing basics and can be done with a simple home setup.
Set up your printing station, align the blank item, and prepare inks and the palette. When you’re ready to print, pull the squeegee with steady, even pressure to deposit ink across the stencil, then adjust hand speed for different designs. After printing, cure the ink per the manufacturer’s guidelines to achieve durable, wash-fast results. If you’re new to this, remember that practice makes perfect and developing a reliable routine is central to any home screen printing setup.
Troubleshooting common issues and maintenance for durable results
As you grow more confident, you’ll encounter issues such as incomplete ink coverage, fuzzy edges, or thinning prints. Incomplete coverage can often be addressed by increasing ink volume slightly and applying a firmer, more even stroke with the squeegee. If edges appear soft, check that the emulsion was fully cured and that the design isn’t too close to the screen edge, recoat if necessary.
Other common problems include cracking, ghosting, or paint transfer to the stencil. Cure times may need adjustment, residues from solvents can affect adhesion, and screens should be cleaned promptly to prevent buildup. Regular maintenance—washing screens after use, inspecting squeegees for nicks, and storing screens properly—extends the life of your gear and keeps your DIY screen printing workflow reliable. This aligns with screen printing basics and helps you deliver consistent results.
Scaling up: budgeting, equipment upgrades, and building a repeatable workflow
Begin with a budget-minded, scalable setup that supports gradual growth. Look for secondhand screens, used exposure units, and affordable ink options to extend your early reach without overspending. A thoughtful upgrade path, aligned with your printing volume, is a core principle of DIY screen printing and helps you justify investments as your business or hobby expands. Focus on a reliable basic kit first and expand as your needs evolve.
Develop a repeatable workflow that saves time and reduces waste: plan job sheets, set up standard registration marks, and batch common operations like washing screens and curing. If you’re printing in bulk, consider a small manual press to improve registration and speed while keeping costs in check. By treating your operation as a system, you’ll steadily improve efficiency and maintain quality across every run, reinforcing the core idea of the home screen printing setup and the broader screen printing basics you’ve learned.
Frequently Asked Questions
What is screen printing at home and why should beginners try DIY screen printing?
Screen printing at home is the DIY process of making prints on textiles or paper using a mesh screen, a stencil, and ink in a personal workspace. It’s beginner-friendly because you can start with a simple one-color design and gradually add colors as you gain confidence. A typical at-home workflow includes planning the design, coating the screen with emulsion, exposing the stencil, setting up the printing station, pulling ink with a squeegee, curing the print, and cleaning the screen.
Which screen printing supplies are essential for starting screen printing at home?
For a beginner, the essential screen printing supplies to start screen printing at home include: aluminum-framed screens with properly stretched polyester mesh (start with 110–195 mesh), emulsion and sensitizer, a way to expose the screen (sun exposure or a dedicated exposure unit), a squeegee, inks (plastisol or water-based), a washout area with cleaning supplies, a drying and curing setup (heat gun or heat press), and a few blank items to print on. Start with a basic kit and upgrade as you gain experience.
How do I set up a home screen printing setup to ensure consistent results?
To set up a home screen printing setup for consistent results, choose a dedicated, well-ventilated workspace with a solid work surface. Create a stable jig or press area for apparel, and leave room for drying unprinted items. Plan for your typical output per session, which will inform screen size, frame rigidity, and ink choice. Begin with a simple, reliable starter kit and add specialty items as you practice.
What is the step-by-step process for how to screen print shirts at home?
Steps: 1) Prepare the design by converting artwork to a high-contrast image and separate colors (start with a single color for beginners). 2) Coat the screen with emulsion in a dark, ventilated area and let it dry. 3) Expose the screen with your design and wash out the non-image areas to reveal the stencil. 4) Set up the printing station and secure the blank item for alignment. 5) Print by applying a small bead of ink and pulling the squeegee with even pressure. 6) Cure the print according to the ink manufacturer’s guidelines. 7) Clean the screen and recoat as needed for the next run.
What common issues may occur in screen printing at home and how can I troubleshoot them?
Common issues in screen printing at home include incomplete ink coverage, fuzzy edges, cracking or peeling, and ghosting. Quick fixes: increase ink volume and use even squeegee pressure for better coverage; ensure the emulsion is fully cured and the screen is clean; verify curing time and temperature; thoroughly wash out the stencil to prevent ghosting; check registration marks and alignment before printing.
What are the screen printing basics I should master when working at home, and how can I scale up?
Screen printing basics to master at home include design preparation, creating a clean stencil via emulsion exposure, proper registration and alignment, choosing inks and curing methods, and maintaining a clean, ventilated workspace. To scale up, gradually add more screens and mesh options, consider a small press for better registration, and develop a repeatable workflow and inventory to handle larger runs without sacrificing quality.
| Key Point | Description |
|---|---|
| Introduction | Home screen printing expands creative control and enables affordable production of custom apparel, posters, and art while guiding you toward a repeatable workflow for consistent results. |
| Planning your setup | Choose a well-ventilated workspace with a sturdy surface and space to dry prints; plan per-session output to guide screen size, frame rigidity, and ink choices. |
| Gradual equipment investment | Start with a basic kit (screens, squeegee, ink, curing method) and gradually add specialty items as you gain experience. |
| Essential equipment and supplies | Core items: screens (110–195 mesh), emulsion and sensitizer, exposure (unit or sun), squeegee, inks (plastisol or water-based), cleaning gear, blank apparel, drying/curing tools. |
| Registration and accuracy | Use corner marks or a jig to align prints; practice with simple designs before tackling complex artwork. |
| Step-by-step process | Prepare design; coat screen; expose and wash out; set up the printing station; print with even pressure; cure; clean and repeat. |
| Design tips | Start with bold, high-contrast designs; limit colors; use simple shapes; print on high-contrast fabrics for legibility. |
| Troubleshooting | Fix issues like incomplete ink coverage, fuzzy edges, cracking, or ghosting by adjusting ink, exposure, and curing; rewash and recoat as needed. |
| Post-print care | Rinse and scrub screens after printing; avoid hot water on uncured plastisol; store screens properly; inspect blades and replace when needed. |
| Budgeting and scaling | Start small, consider secondhand gear, and gradually add screens, mesh counts, or a small exposure unit to improve workflow and print quality. |
Summary
Conclusion: Screen printing at home is a journey of hands-on practice and steady workflow that yields repeatable, professional-looking results. By building a dedicated, well-ventilated workspace and gradually expanding your setup—mastering emulsions, exposures, and curing—you can produce high-quality prints on apparel, posters, and art without outsourcing. This home-based approach offers creative freedom, cost efficiency, and scalable production, empowering you to iterate, refine your process, and grow your screen printing at home practice into a reliable craft or small business.