
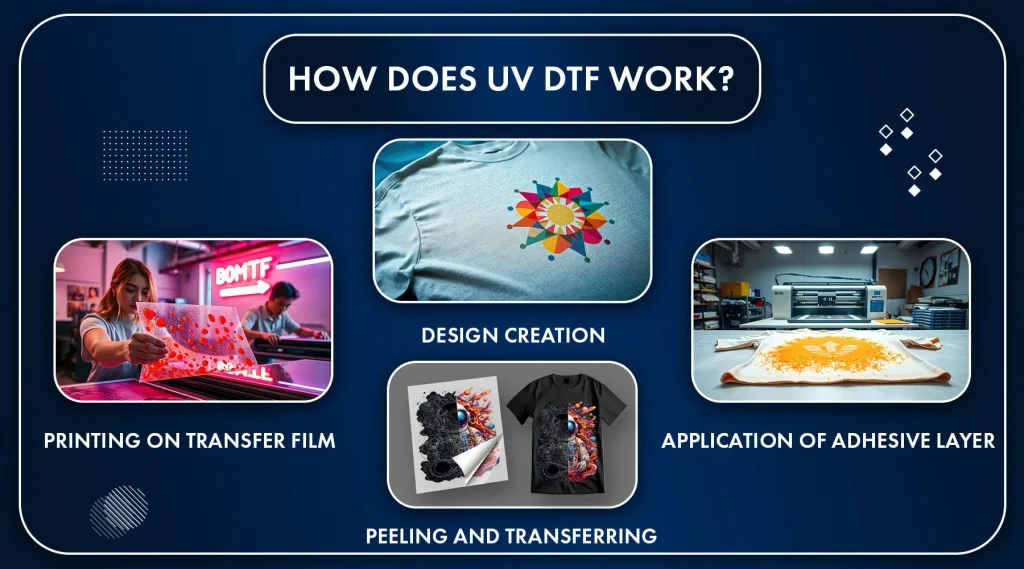
UV DTF transfers care matters for keeping vibrant heat-applied designs intact while protecting the fabric you love. This introductory guide explains removing UV DTF transfers and how to preserve color during routine laundering. We cover DTF transfer garment care, how to remove DTF transfers from clothing, and fabric care after DTF transfer to help you extend garment life. By following gentle methods and proper washing, you can prevent cracking, peeling, and color fade. Whether you are new to DTF printing or refreshing a wardrobe, these care tips for UV DTF printed garments help.
Beyond the acronym, these designs are heat applied via adhesive films, sometimes called transfer decals, bonded to fabrics with a thin glue. From an LSI perspective, care conversations use terms like print longevity, garment maintenance, and safe washing practices for heat transfer graphics. Other related phrases you might encounter include adhesive residue management, post print fabric care, and safe removal techniques for worn or unwanted transfers. A practical routine emphasizes gentle laundering, turning garments inside out, and air drying to safeguard both the image and the fabric. Understanding these alternative terms helps you build effective care routines without being tied to a single label.
UV DTF transfers care: Key principles for color, adhesion, and fabric safety
Understanding the core principles of UV DTF transfers care helps protect color vibrancy, adhesion strength, and fabric integrity from day one. Heat, solvents, and fabric type all influence how well a transfer performs over time, so establishing safe handling and routine care is essential. This approach also supports the broader goals of DTF transfer garment care by aligning cleaning methods with fabric compatibility.
Key practices include testing a small patch, avoiding harsh chemicals, and washing on a cool cycle with the garment inside out. When you treat prints with care, you reduce cracking, peeling, and color fading, helping UV DTF transfers stay sharp longer across multiple wears. If you are wondering how to remove DTF transfers from clothing in the future, planning for removal now minimizes risk to the fabric.
Removable methods for UV DTF transfers: gentle options for different fabrics
Fabrics respond differently to heat and solvents, so choose removal methods that match the garment type and print adhesion. Assessing fabric tolerance helps prevent color bleed and fiber damage while you work toward removing UV DTF transfers. This careful approach supports long-term garment care and easier post-removal laundering.
Start with gentle peeling and heat-assisted lifting if the edge is loose, then move to solvent-assisted steps only as needed. This mirrors best practices for DTF transfer garment care and minimizes stress on the fabric as you learn how to remove UV DTF transfers from clothing.
Choosing the right solvent: safe removal while protecting dyes
The solvent you select should balance adhesive strength with fabric safety, especially for colored dyes. Always perform a patch test to gauge dye behavior before full removal.
When using solvents, dab and blot rather than rubbing, limit exposure, and monitor any color change. Acetone-based products can dissolve adhesive but may affect dye stability on some fabrics, so proceed with caution.
Adhesive residue management after transfer removal
Even after removal, adhesive residue can remain and affect hand feel and wash performance. Use isopropyl alcohol to blot away sticky bits, then follow with a cold-water wash to flush residues.
Rinse thoroughly and air dry before laundering to prevent solvent buildup and reactivation of adhesives. Address any remaining stickiness promptly to preserve fabric texture and color.
Aftercare routines to extend life of UV DTF printed garments
Develop a gentle washing routine: cold water, mild detergent, and a shorter cycle to protect the print. Turning garments inside out during wash reduces friction that can dull colors on UV DTF printed garments.
Air drying or tumble-drying on low heat helps maintain adhesion and fabric integrity, while avoiding chlorine bleach supports long-term wear. Consider using a fabric protector only on non-printed areas and test first to ensure color safety.
Common mistakes and troubleshooting for UV DTF transfers care
Avoid abrasive scrubbers, metal tools, and high heat on or near the transfer, as these practices accelerate cracking and peeling.
If you notice fading or peeling, adjust wash settings, re-test patches, and consult the design producer guidelines for recommended care tips for UV DTF printed garments.
Frequently Asked Questions
What does UV DTF transfers care involve and why is it important for garment longevity?
UV DTF transfers care involves how you wash, dry, and handle garments bearing UV DTF prints. Following proper UV DTF transfers care helps prevent cracking, peeling, and fading while protecting the fabric and adhesive. Key steps include washing in cold water with a gentle detergent, turning the garment inside out to protect the print, and following fabric care after DTF transfer by air drying or using a low heat setting, while avoiding chlorine bleach or direct heat on the print.
How to remove UV DTF transfers from clothing without damaging the fabric?
As part of UV DTF transfers care, start by assessing fabric content and print adhesion, then perform a patch test with isopropyl alcohol on an inconspicuous area. If safe, gently heat the edge with a hair dryer or a low‑heat iron to loosen the transfer, then peel slowly. For stubborn spots, dab with alcohol rather than rubbing, rinse, and repeat in small sections.
What are the best methods for removing UV DTF transfers and cleaning adhesive residues?
In UV DTF transfers care, you have several options: use heat-assisted peeling for meagerly bonded transfers, dab with isopropyl alcohol to loosen adhesive, and, with caution, use acetone‑based products after a patch test. Avoid metal tools; opt for a soft plastic scraper if needed. After removal, wipe residue with alcohol, rinse well, and launder as directed.
What fabric care steps should be followed after a UV DTF transfer is applied or removed?
Follow UV DTF transfers care guidelines: wash on a gentle cycle in cold water with a mild detergent, turn the garment inside out, and avoid chlorine bleach. Air dry or tumble on low heat, and iron on the reverse side if needed. If adhesive residue remains, treat before washing and avoid direct heat on the print.
How can care tips for UV DTF printed garments help extend their life?
To extend UV DTF printed garments, establish a gentle wash routine that avoids hot water and harsh detergents, rotate prints to reduce wear, and consider using a fabric conditioner if suitable for the fiber. Test any fabric protector spray on a hidden area first, and store garments away from direct sunlight to prevent color fading.
What common mistakes should be avoided in UV DTF transfers care?
Common mistakes in UV DTF transfers care include using abrasive scrubbers, applying high heat directly on the print during washing or drying, ignoring the care label, overdosing fabric conditioners, and soaking for long periods. Always patch test cleaners or solvents and follow the garment’s care instructions to preserve color and adhesion.
| Topic | Overview | Practical Takeaways |
|---|---|---|
| Introduction to UV DTF transfers care | UV DTF transfers offer vibrant, durable prints, and proper care starts with understanding the basics of what these transfers are and why ongoing care matters. | Recognize purpose, importance of care from the start, and the goal to preserve color and adhesion over time. |
| Understanding why care matters | Direct‑to‑film transfers are heat‑applied designs that look great but require mindful washing and handling to prevent cracking, peeling, or fading. | Be mindful of wash/dry cycles and protect prints during laundering. |
| Preparation for removal | Before removing a UV DTF transfer, assess the fabric and print, inspect integrity, and protect surrounding areas. | Check fabric content; inspect transfer edges; perform a small patch test with solvent. |
| Removal methods | Several strategies exist: gentle peeling with heat assist, solvent‑based removal, acetone caution, and mechanical assistance. | Choose method based on print, fabric, and comfort level; avoid damaging the fabric. |
| Handling adhesive residues | Post‑removal residues can remain; address safely to restore fabric feel. | Wipe with isopropyl alcohol, blot, rinse, and air dry before laundering; avoid harsh rubbing. |
| Aftercare and care tips for UV DTF printed garments | Care after removal or maintenance minimizes issues and extends life of the print and fabric. | Wash cold on gentle cycle, turn garment inside out, avoid high heat, and iron with a protective layer or from the reverse side. |
| Long‑term integrity | Establish routine habits to protect prints and fabric longevity. | Regular gentle washing, optional fabric protector tests, garment rotation, and avoiding harsh chemicals. |
| Common mistakes to avoid | Common pitfalls can damage prints or fabrics. | Avoid abrasive scrubbers, direct high heat on transfers, ignoring care labels, and over‑soaking. |
Summary
UV DTF transfers care is the foundation for preserving vibrant colors, strong adhesion, and fabric integrity over time. By understanding how to remove UV DTF transfers safely, addressing adhesive residues, and following thoughtful fabric care practices, you can extend the life of prints on garments and keep them looking fresh through many wears. This guidance covers removing UV DTF transfers, proper fabric care after a transfer, and practical tips to minimize wear. Remember to test patches, choose gentle removal methods, launder with care, and store garments away from direct sun to maintain color and texture in UV DTF printed garments.