
The Custom Banner Printing Process turns a simple idea into a high-impact sign that captures attention. This structured workflow blends banner design steps with careful material selection, color management, and production timing to ensure consistency. From concept to print, teams prepare print-ready banner design files for vinyl banner printing and plan for large format printing that reads clearly from a distance. Careful material choices and finishing options are coordinated to support the banner fabrication workflow, delivering durability and ease of installation. By starting with a clear brief and a repeatable process, you can reduce revisions, shorten lead times, and achieve bold, legible results across sizes.
Seen through alternative terms, the topic maps ideas to tangible, attention-grabbing signage from concept to installation. Phrases such as signage creation, banner production pipeline, and display fabrication echo the same workflow while boosting relevance for search engines. Using related concepts like design-to-production workflow, print-ready assets, substrate selection, and color management helps readers understand the process from planning to final display.
1. Understanding the Custom Banner Printing Process: From Brief to Bold Signage
Every striking banner begins as an idea and ends as a physical sign that captures attention. The Custom Banner Printing Process is a coordinated workflow that blends design intent with material science, color accuracy, and production timing. By framing the journey around banner design steps and aligning them with the capabilities of large format printing, you get a sign that is legible, durable, and visually impactful across environments.
This process mindset helps reduce revisions, shorten lead times, and ensure consistency when producing banners of various sizes. As you move from concept to print, you’ll see how each phase—from goal setting to final finishing—interlocks with the others, forming a reliable banner fabrication workflow that translates creative ideas into tangible, high-visibility signage.
2. Step 1–2: Defining Goals, Constraints, and Concept Design
Step 1 centers on a clear brief: what the banner promotes, where it will be placed, and how far viewers will be. Indoor vs. outdoor use guides material selection and finishing needs, while distance viewing considerations push for legible type, high-contrast color, and concise messaging. Document practical constraints such as maximum width, height, and mounting methods to keep the project on track within the banner design steps.
Step 2 translates goals into visuals, balancing brand identity with readability. Create multiple design concepts to evaluate layouts, imagery, and typography in real-world contexts. This stage also covers the preproduction step of preparing print-ready banner design files—bleeds, safe margins, scalable vectors—so the files are ready for the large format printing process. Mockups and proofs at this stage bridge design intent with production feasibility within the banner fabrication workflow.
3. Material Selection and Finishing for Outdoor and Indoor Banners
Material choice affects durability, weight, and installation, with vinyl banner printing being the backbone of outdoor signage due to weather resistance and cost-effectiveness. Mesh vinyl offers airflow for windy locations without sacrificing readability, while indoor projects may benefit from premium PVC-free fabrics with a matte or satin finish. Finishing options—reinforced hems, eyelets or grommets, pole pockets, and wind slits—speed up installation and enhance security on site.
Lamination or UV coatings extend life in sun-exposed environments and protect graphics from abrasion. The Custom Banner Printing Process relies on a collaborative decision between design intent and printer capabilities to select substrates and finishes that meet budget, lifespan, and mounting needs. This phase lays the groundwork for reliable performance in the field and sets expectations for how the banner will endure its environment.
4. Prepress, Color Management, and Proofing for Print-Ready Banner Design
Prepress is the quiet gatekeeper of print quality: prepare files with correct bleeds (0.125 to 0.25 inches, depending on the printer), safe zones, and scalable vector elements for logos. Color management, using ICC profiles matched to the printer and substrate, ensures consistent results across devices and inks and preserves brand colors. Print proofs—digital or physical—allow you to verify color, layout, and readability before committing to a full-width run.
If your banner includes imagery, ensure high-resolution originals or properly scaled raster images to avoid pixelation. This phase minimizes costly revisions and aligns the artwork with brand standards. The prepress step is foundational to the print-ready banner design, and it integrates tightly with the broader banner design steps to ensure the final output looks correct when viewed up close and from a distance.
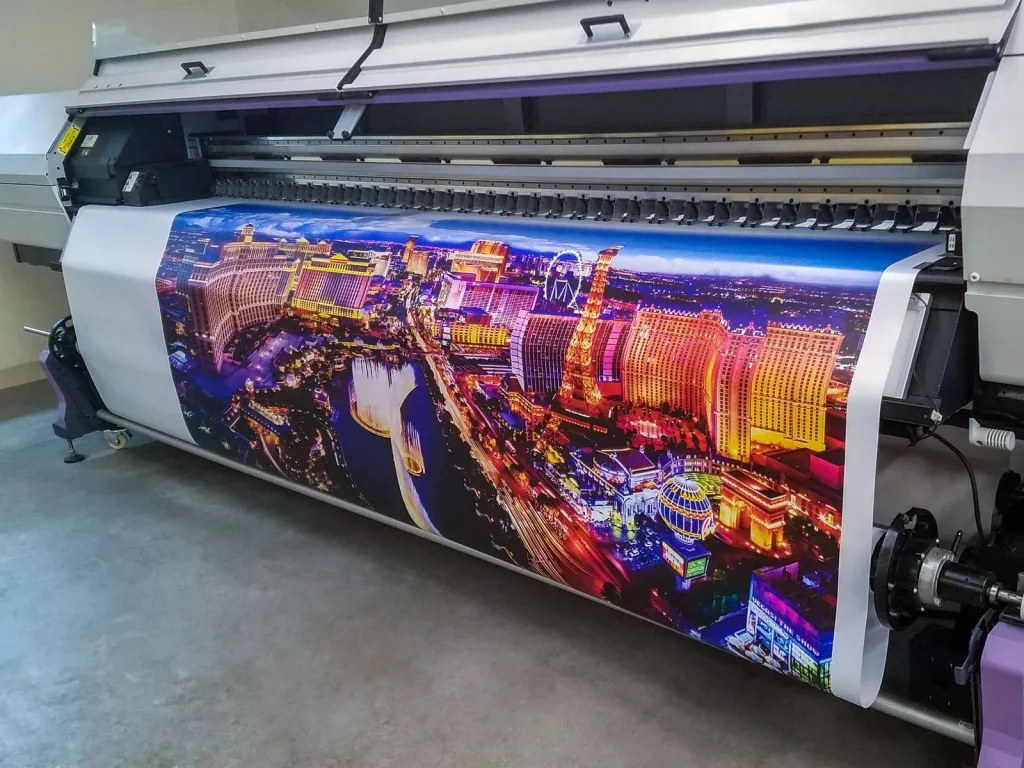
5. Printing, Post-Processing, and Quality Control in Large-Format Banner Production
Printing is where design meets production reality. Large format printing uses wide-format inks and substrates chosen for durability, with solvent, eco-solvent, latex, or UV-curable inks depending on material and environment. Pay attention to resolution, color temperature, and contrast to maintain legibility at the intended viewing distance. After printing, post-processing steps—trimming, contour cutting for complex shapes, and protective lamination—enhance durability and ease of cleaning for outdoor installations.
Quality control then checks color consistency, edge quality, and any misregistration or missing elements before final delivery. This stage is the heart of the banner fabrication workflow, translating color data and design into a tangible, attention-grabbing sign that performs as expected in the field and meets client expectations for both appearance and longevity.
6. Packaging, Logistics, and Installation: Delivering Signage On Time
Even the best banner can fail if poorly packaged or misaligned with installation plans. Plan secure packaging to protect edges and corners during shipping, and document mounting hardware, anchor points, and installation height to ensure safety and visibility for outdoor or indoor sites. If professional rigging is required, coordinate timelines with site managers to align production with delivery and installation windows.
Include a quick-access installation guide and care instructions to help clients maximize life and performance. For longer campaigns, reinforced hems and heavier stock may be warranted, and temporary banners may need more frequent replacements. Close the loop by ensuring the banner reaches its destination ready to perform, completing the full banner fabrication workflow from concept to sign.
Frequently Asked Questions
What is the Custom Banner Printing Process and how do the banner design steps influence the final result?
The Custom Banner Printing Process is a structured workflow from concept to print that ensures legibility, durability, and visual impact. The banner design steps define target audience, banner size, placement, and messaging, guiding color choices, typography, and layout decisions for print-ready banner design. A clear brief and early alignment reduce revisions and keep production on schedule.
How do the banner design steps in the Custom Banner Printing Process influence readability in large format printing?
By prioritizing high-contrast colors, legible typography, and concise messaging, the design steps ensure banners read clearly from the viewing distance required in large format printing. They also establish safe margins, bleeds, and scalable vector elements so edges stay crisp in large formats. Realistic mockups help verify readability before production.
Which materials and finishing options are recommended in vinyl banner printing within the banner fabrication workflow?
For outdoor durability, use vinyl banner printing with weather-resistant vinyl and UV stability; mesh vinyl can improve airflow while preserving readability. Finishing options like reinforced hems, eyelets, pole pockets, and wind slits speed installation and improve security. The banner fabrication workflow ensures substrate, finish, and printer capabilities align with environmental needs.
What does a print-ready banner design include in the Custom Banner Printing Process to ensure color accuracy?
It should include proper bleeds (0.125–0.25 inches), safe zones, and scalable vector graphics; high-resolution images are required to avoid pixelation. Color management uses ICC profiles matched to the printer and substrate, and proofs (digital or physical) verify color and layout before full production. This ensures brand colors reproduce consistently in the Custom Banner Printing Process.
How does large format printing handle proofs and color management during the Custom Banner Printing Process?
Prepress in the Custom Banner Printing Process uses ICC color profiles and device-specific calibrations to achieve consistent color. Print proofs—digital or physical—allow checking of color, layout, and readability before running the full-width banner, reducing costly reprints in large format printing.
What factors in packaging, logistics, and installation planning ensure durability of banners after printing in the banner fabrication workflow?
Secure packaging protects edges during shipping, and installation planning documents mounting hardware, anchors, and travel timelines. The banner fabrication workflow often specifies reinforced hems, heavier stock for long-term use, and care instructions to maximize lifespan. Proper planning minimizes damage and ensures the banner performs as intended in the field.
| Stage | Purpose | Key Points |
|---|---|---|
| Introduction (Overview) | Set up a structured workflow from concept to print; ensure legibility, durability, and impact. | Banners progress from idea to physical sign, requiring alignment of design, materials, color accuracy, and production timing; a structured process reduces revisions and ensures consistency across sizes and environments. |
| Step 1 — Define goals and constraints | Establish a clear brief and constraints to guide decisions. | Identify banner purpose, placement, distance, and indoor/outdoor use; plan for legible type, high-contrast color, and simple messaging. Record maximum width/height and mounting method. Consider environmental exposure (sun, rain, wind, temperature) affecting substrate and ink durability. |
| Step 2 — Concept and design: branding & readability | Translate goals into visuals that balance branding with quick readability. | Use brand colors/typography, adapted for viewing distance; favor high-contrast schemes, concise messaging, and a clear focal point. Create multiple concepts; prepare print-ready files with bleeds, safe margins, scalable vectors; include mockups/proofs to verify how the banner will look in its environment. |
| Step 3 — Material selection & finishing | Choose substrates and finishes that suit durability and installation. | Outdoor need: vinyl with weather resistance, UV stability, and cost effectiveness; mesh vinyl for airflow; indoor options: PVC-free fabrics with matte/satin finishes. Finishing options include reinforced hems, eyelets, pole pockets, wind slits; laminates/UV coatings extend life. Budget, lifespan, and mounting method influence material choice; collaboration with printer is essential. |
| Step 4 — Prepress, color management & proofs | Ensure print readiness and color fidelity. | Provide correct bleeds (roughly 0.125–0.25 in), safe zones, and scalable vector elements. Use ICC profiles matched to printer/substrate; produce proofs (digital or physical) to verify color, layout, and readability. Use high-resolution images; minimizing misalignment reduces costly revisions; foundational step for consistent brand standards. |
| Step 5 — Printing, post-processing & quality control | Turn design into a durable, display-ready banner and check quality. | Use appropriate wide-format inks; ensure readability at target distance. After printing, trim or contour-cut as needed and apply laminate if required for durability. Check color consistency, edge quality, and alignment; post-processing protects investment and ensures field performance. |
| Step 6 — Packaging, logistics & installation planning | Plan safe transport and proper install. | Package securely to protect edges; document mounting hardware and installation height. Coordinate with venue/site managers if rigging or scaffolding is needed. Provide a quick-install guide and care instructions to maximize lifespan; reinforced hems or heavier stock may be used for long-term signage. |
Summary
Conclusion
The Custom Banner Printing Process is a holistic workflow that touches every aspect of design, substrate science, color accuracy, and production efficiency. By starting with a clear brief, aligning design with branding and readability, selecting the right material and finish, validating through proofs, and executing with careful printing and post-processing, you can deliver banners that look bold, read clearly, and withstand the environment. Whether you’re producing a single banner for a pop-up shop or a fleet of signs for a major event, sticking to this structured process reduces guesswork, speeds up lead times, and improves overall results. As technology and materials evolve, the core principles of good design, precise color management, and robust construction remain the backbone of a successful banner that communicates your message with impact.