
Embroidered Patches have evolved far beyond simple adornments. Today, they are a versatile tool for personal expression, team branding, organization, and storytelling through embroidered patches. Whether you’re outfitting a sports team, launching a fashion line, or decorating work uniforms, custom embroidered patches deliver durability, color fidelity, and a tactile finish that makes a statement. In this introductory guide to patch styles and sizes, you’ll learn how patches are designed, produced, and applied, with practical tips to choose the right patch for your project. For added versatility, consider iron-on patches for quick customization or sew-on patches for long-lasting wear, and plan how care will affect longevity.
Beyond the familiar name, these items function as stitched emblems, decorative fabric badges, or embroidered insignias that convey identity and brand. Whether you refer to them as custom stitched patches, fabric badges with embroidery, or embroidered insignias, the core ideas of design, backing, and durability apply. Using LSI-inspired language, think in terms of quality threads, backing options, patch shapes, and application methods to plan cohesive branding across garments.
Embroidered Patches: What They Are and Why They Matter
Embroidered Patches are fabric-backed artworks created with an embroidery machine. The design is stitched onto a backing, then finished with an edge such as a merrow border that prevents fraying and gives a polished look. The result is a durable, textured badge that stays vibrant through repeated wear and washing.
As a branding and storytelling tool, embroidered patches—whether you’re using standard iron-on patches or sew-on patches for longer-lasting wear—offer a higher-end appearance than many printing methods. For brands and teams, exploring custom embroidered patches helps you align designs with patch styles and sizes that fit every surface and application.
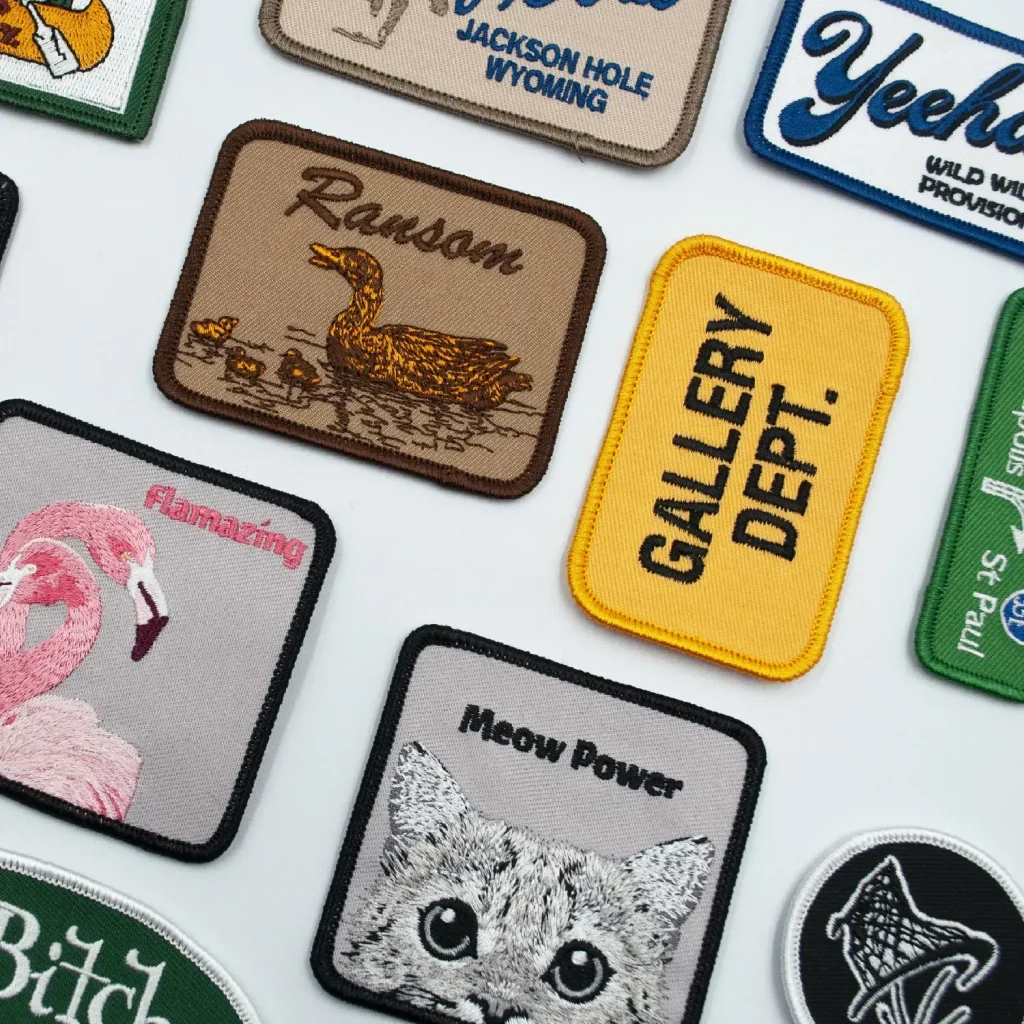
Patch Styles and Designs: From Classic to Custom Shapes
Patch styles and designs span classic round and shield shapes, crests and badges, vintage or retro looks, 3D puff embroidery, chenille and felt textures, as well as custom shapes and die-cut silhouettes. Each style offers a different mood and branding impact, from traditional club insignia to bold fashion logos.
Choosing the right combination of patch styles and sizes helps you tell your story clearly. With options like custom embroidered patches, you can tailor shapes, borders, and textures to suit your audience, surface, and method of attachment—whether you’re applying to jackets, caps, bags, or uniforms.
Sizing Strategies: Patch Styles and Sizes for Visibility and Balance
Patch sizes range from small 1″ to 1.5″ for cuffs and hats to medium 2″–3″ for jackets and backpacks, and large 4″ or bigger for statement pieces. The size you choose affects visibility, legibility of text, and how the design reads at a distance. Denser artwork requires careful planning of stitch count to preserve detail.
Dense or complex designs may need simplified shapes or smaller lettering to retain clarity across patch sizes. Balancing patch style, size, and the fabric surface ensures the logo remains recognizable without overpowering the garment, whether you’re using iron-on patches or sew-on patches.
Backings and Attachments: Iron-On, Sew-On, and Alternatives
Iron-on patches bring quick customization to crowds and small runs. These patches use a heat-activated adhesive on the backing and bond to fabric when pressed with a heat source. They’re convenient for personal projects and limited productions, but advisable to follow care instructions after application to maximize durability.
Sew-on patches provide long-term durability and fabric compatibility across a wide range of textiles. They’re generally preferred for workwear and items that launder frequently, as stitching holds up better than heat-activated adhesives. Velcro-backed patches offer another way to swap logos on uniforms or gear.
From Concept to Creation: The Custom Patch Production Process
Custom patch production begins with concept and artwork. A strong logo or artwork is digitized into embroidery software, where stitch types, densities, and underlay are planned to achieve the final look. Color matching with Pantone or equivalent systems helps maintain consistency across batches.
The process continues with proofing and sampling, followed by production and finishing touches. Edges are merrowed or satin-stitched, backings are added, and the chosen attachment method (iron-on, sew-on, or Velcro) is prepared for final use. Lead times vary by quantity, size, and complexity, so planning is essential for large projects.
Care and Longevity for Embroidered Patches: Maintenance Tips
To keep embroidered patches looking fresh, follow care and maintenance guidelines: turn garments inside out, use a gentle cycle with cold water, and air dry when possible. For iron-on patches, re-press after washing if adhesion seems weak, taking care to follow the fabric’s care instructions.
Regularly inspect patches for loose threads and trim them to maintain a clean edge. Color fastness and edge finishing help patches resist fading, while choosing the right backing for the fabric type ensures longevity in activewear or uniforms. Proper storage, kept flat, helps prevent backing distortion over time.
Frequently Asked Questions
What are Embroidered Patches and why are they a popular choice for branding?
Embroidered Patches are fabric pieces with stitched artwork backed by durable materials. They offer color fidelity and a tactile texture that holds up to washing, making them a preferred option for uniforms, apparel, and gear. Available as iron-on patches or sew-on patches, they also come in various patch styles and sizes to suit different surfaces and branding needs.
How can custom embroidered patches enhance branding on team uniforms?
Custom embroidered patches provide a premium, cohesive look for teams and organizations. They enable clear logo display, ranks, and achievements, are durable for frequent wear, and can be applied as iron-on patches or sew-on patches to streamline branding across many uniforms.
What are the patch styles and sizes to consider for embroidered patches?
Patch styles include classic round and shield, crests and badges, vintage designs, 3D puff patches, chenille and felt patches, and custom shapes. Sizes range from small 1″–1.5″, to medium 2″–3″, up to large 4″ and beyond. Density and legibility should match the artwork to ensure details read well at the chosen size.
Iron-on patches or sew-on patches: which is better for durability and laundering?
Sew-on patches generally offer superior long-term durability, especially for workwear and frequently laundered items, while iron-on patches provide quick, DIY application. For fabrics sensitive to heat, or for items that endure heavy washing, sew-on patches or Velcro-backed options are often more reliable.
How should I care for embroidered patches to preserve color and texture?
Care for embroidered patches by turning garments inside out, washing in cold water, and air-drying when possible. If using iron-on patches, re-press after washing if adhesion weakens, and inspect edges for loose threads to trim for a clean finish.
What’s the typical process to design and produce embroidered patches, and how long does it take?
The process usually includes concept and artwork, digitizing, color matching, proofing, production, and finishing. Lead times depend on quantity, patch size, and complexity. Final approval after proofs helps ensure accurate results for custom embroidered patches.
| Topic | Key Points |
|---|---|
| What are embroidered patches? | Fabric pieces with stitched artwork created by an embroidery machine; the design is digitized into sewing instructions and stitched onto backing; finished with an edge to prevent fraying; durable threads yield a crisp, long‑lasting image and a higher‑end appearance. |
| Styles of embroidered patches | Multiple styles to fit branding: classic round/shield; crest/badge; vintage/retro; 3D puff; chenille/felt; custom shapes/die‑cut. |
| Patch styles and sizes | Small 1″–1.5″; Medium 2″–3″; Large 4″+; density and legibility: more detail requires higher stitch counts, simplify for smaller sizes. |
| Backings and attachments | Iron-on (heat‑activated adhesive); Sew-on (stitch to fabric); Velcro‑backed for interchangeable patches; choice affects durability and removal. |
| Quality and durability considerations | Materials (polyester/rayon threads); edge finishing (merrow/satin); thread density and cost; backing compatibility with fabric; color fastness. |
| Applications and use cases | Clothing and accessories; teams/clubs; corporate branding; limited editions and collaborations; custom art and fashion. |
| Custom patch design and production process | Concept/artwork; digitizing; color matching; proofing; production/lead times; finishing (edges/backing). |
| Choosing the right patch | Fabric compatibility; visibility/branding impact; washability; budget and timeline. |
| Care and maintenance tips | Turn garments inside out; gentle cold wash; air‑dry; re‑press iron‑ons if adhesion weak; trim loose threads; store flat. |
Summary
Embroidered Patches offer a flexible, durable, and visually expressive way to convey identity, branding, and personal style. This overview covers patch styles and sizes, backing options like iron‑on and sew‑on patches, and practical considerations for fabric types and washing. By understanding the design and production process—from concept and digitizing to color matching, proofing, and finishing—you can select or create patches that look great, wear well, and reinforce your message. Whether building a team identity, branding a product line, or adding a personal touch to garments, custom embroidered patches deliver lasting impact, texture, and professional appeal.