
DIY 3D embroidered wall art offers a playful intersection of needlework and sculpture, turning fabric into tactile, dimensional art that can transform a room. This approach, a form of 3D embroidery wall art, takes traditional embroidery beyond flat stitches by layering fabrics, textures, and subtle forms to create depth and shadow. If you’re looking for a textiles-based decor project that feels contemporary yet warm, this technique is a perfect fit. In this guide, we’ll explore what this art form is, the materials you’ll need, effective techniques, design ideas, a step-by-step project to get you started, display tips, and care considerations. By the end, you’ll have a solid foundation to start crafting handmade textile wall art that resonates with your personal style and home decor aesthetic.
Beyond the exact label, the concept can be described as three-dimensional textile wall decor that blends thread, fabric, and form. Other expressions include dimensional embroidery, fabric sculpture, and layered appliqué that elevate wall hangings into tactile artworks. For readers seeking inspiration, ideas such as sculpted botanicals, geometric reliefs, and tactile landscapes align with embroidery wall art ideas and DIY embroidery projects. Begin with simple textures and progress toward more complex layering, letting color and fabric choice guide the dimensional read. This LSI-informed approach helps search engines connect related topics while offering readers diverse entry points into handmade textile wall art. The language of craft and design blends seamlessly with modern home styling, making this approach accessible to beginners and seasoned makers alike. If you’re planning photos or tutorials, use close-up shots of stitching, layers, and textures to illustrate the dimensional narrative.
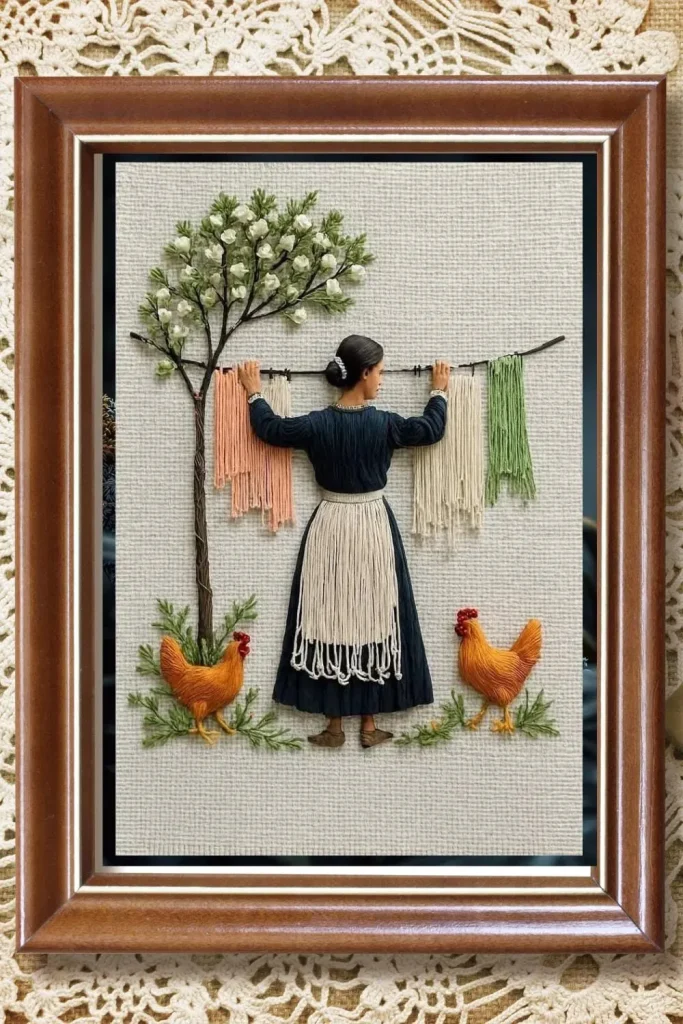
DIY 3D embroidered wall art: A Modern Textile Sculpture
DIY 3D embroidered wall art blends needlework with sculpture, turning fabric into tangible, wall-mounted forms that catch light and cast shadow. By layering fabrics, padding, and stitched contours, this approach creates depth and dimension that go beyond traditional embroidery. It’s a decor approach that feels contemporary yet warm, welcoming texture and handmade character into any room.
Getting started is about embracing a small palette and a simple composition. Begin with a few raised elements—petals, leaves, or geometric shapes—and plan the layers so the piece reads from the base outward. The beauty lies in how light interacts with the raised areas, creating subtle shifts in tone as you move around the wall.
What Makes 3D Embroidery Wall Art Stand Out in Home Decor
The dimensional, raised elements of 3D embroidery wall art invite closer inspection and touch, making the piece feel alive rather than flat. Depth and shadow shift with the room’s lighting, giving your wall a dynamic focal point that changes with the day. This tactile quality distinguishes handmade textiles from standard wall art prints.
In interior design, embroidery wall art ideas span from serene and minimalist to lush and textured. A well-chosen piece can mirror your space’s mood—whether you prefer soft gradients and floral layers or bold geometric structures—while still communicating craftsmanship and a handmade textile wall art ethos.
Essential Materials and Tools for DIY Embroidery Projects
Starting a DIY embroidery project doesn’t require a large studio. Core materials include a base fabric such as cotton, linen, or canvas, plus a stabilizer to keep layers aligned during assembly. A hoop or frame helps maintain tension, which is crucial when working with multiple layers and padding.
You’ll also need a mix of threads—cotton floss, pearl cotton, and sometimes weighted threads—along with appropriate needles. Padding and shaping materials like felt, foam, or batting create the raised forms, while adhesives can help initial placement. Optional tools—heat-set web, beads, ribbons, or textured yarns—unlock additional 3D embroidery techniques for richer dimension.
Techniques to Create Depth: Padding, Layering, and Raised Stitches
Creating depth relies on padding behind fabric shapes, then stitching around the edges to secure the lift. Small amounts of batting or foam tucked beneath elements give dimension without bulk, while satin, chain, or backstitch edges define the boundaries.
Layered appliqué and built‑up outlines amplify the dimensional effect. By layering felt or fabric shapes and using raised stitches with thicker threads or yarn, you can craft tactile surfaces that feel sculptural. Combining different stitch types and subtle color blends further enhances depth and the sculpture-like quality of the piece.
Design Ideas to Inspire Your Embroidery Wall Art Ideas
Embroidery wall art ideas range from natural motifs to graphic abstractions. Floral bursts with padded centers create a soft, organic focal point, while geometric abstracts—triangles, circles, and rectangles—delight with clean lines and contemporary rhythm.
Landscape silhouettes and nature-inspired panoramas use layered horizons and sky tones to add atmosphere to a room. Seasonal displays let you rotate pieces—pastel blossoms for spring or warm leaf tones for autumn—so your handmade textile wall art stays fresh and aligned with your decor.
Display, Care, and Maintenance for Handmade Textile Wall Art
There are multiple display options beyond a standard frame. Shadow box frames preserve raised elements, while gallery-wrapped canvases let the fabric float on a wooden frame. A textile panel with a simple hanging system or a floating frame can emphasize the sculpture-like presence of the piece.
Care for handmade textile wall art is straightforward: avoid direct sunlight to prevent fading, dust gently with a soft brush, and keep moisture away to prevent warping. If humidity is a concern, consider breathable backings or protective mounting to preserve the integrity of layered shapes and padding over time.
Frequently Asked Questions
What is a beginner-friendly DIY 3D embroidered wall art project to start with?
A great starting point is the Minimal 3D Blossom Wall Art. Plan a simple bouquet, cut a few blossom shapes, layer padding behind them, and stitch the edges to secure the layers. This weekend-friendly project teaches padding, layering, and finishing without overwhelming you.
What essential materials do I need for 3D embroidery wall art?
For a solid start, gather base fabric (cotton, linen, or canvas), a stabilizer, an embroidery hoop, a selection of threads, and padding materials like felt or foam. Add optional items such as fusible web, beads, and textured yarn to expand the dimensional look.
Which 3D embroidery techniques work best for creating depth in embroidery wall art ideas?
Key techniques include padding behind shapes, built-up outlines, layered appliqué, raised stitches, and varied textures. These 3D embroidery techniques help your piece read as sculpture while remaining textile-based.
How should I frame and display handmade textile wall art to showcase the 3D effects?
Display options like a shadow box frame, gallery-wrapped canvas, a textile panel, or a floating frame work well to preserve the raised elements. Choose a mounting method that keeps the piece flat on the back while allowing the texture to stand out.
What are common challenges when creating 3D embroidery wall art and how can I fix them?
Common issues include warping, flatness, fraying, and detachment. Solutions include using the right stabilizer, re-stabilizing during assembly, adding extra padding or stitches, and finishing raw edges with a tight satin stitch for durability.
What SEO tips can help when publishing DIY embroidery projects about 3D embroidered wall art?
Use the focus keyword DIY 3D embroidered wall art naturally, and weave in related terms such as 3D embroidery wall art, DIY embroidery projects, handmade textile wall art, embroidery wall art ideas, and 3D embroidery techniques. Structure content with clear headings, include descriptive alt text for images, and feature high-quality visuals to improve search visibility.
| Topic | Key Points |
|---|---|
| What is DIY 3D Embroidered Wall Art? | – Fabric-based pieces using embroidery stitches, layering, and padding to create raised elements on a flat surface; reads as textile art and wall sculpture; versatile in style from minimalist to lush with texture. |
| Materials and Tools you’ll Need | – Base fabric (cotton/linen/canvas); Stabilizer (tear-away/cut-away); Hoop/frame; Threads (cotton/pearl/yarn); Needles; Padding/shaping materials; Scissors; Adhesives; Patterns/transfer tools; Optional: heat-set web, beads/trims, thick yarn. |
| Starting with a Simple Design | – Begin with small compositions (bouquet, simple landscape, abstract shapes); build in layers; aim for gentle depth; use color-blocking to guide the eye. |
| Techniques for Depth and Dimension | – Padding behind shapes; Built-up outlines; Layered appliqué; Raised stitches; Textured surfaces with varied stitches; Color blending for subtle gradients. |
| Design Ideas to Inspire Your Projects | – Floral bursts; Geometric abstracts; Landscape silhouettes; Nature panoramas; Seasonal displays. |
| A Step-by-Step Beginner Project: Minimal 3D Blossom Wall Art | – Plan and cut; Prepare the base; Add padding; Build layers; Outline and details; Finishing touches; Display options (shadow box, framed, or panel). |
| Framing, Display, and Care | – Framing: shadow box, gallery-wrapped canvas, textile panel, or floating frame; Care: avoid direct sunlight, dust gently, avoid moisture; humidity considerations. |
| Common Challenges and Solutions | – Warping/distortion: use proper stabilizer and consistent tension; – Flatness: add more padding or re-secure edges; – Fraying: finish edges with satin stitch; – Detachment: combine fabric glue for placement with stitches for durability. |
| SEO Considerations and Publishing Tips | – Use focus keyword DIY 3D embroidered wall art naturally; incorporate related terms (3D embroidery wall art, DIY embroidery projects, handmade textile wall art, embroidery wall art ideas, 3D embroidery techniques); use descriptive subheadings and alt text for images to aid search engines and readers. |