
When you weigh iron-on vs sew-on patches, you weigh speed against lasting security. For quick customization, iron-on patches shine with a heat-activated bond that makes installation fast and mess-free. For longevity and heavy use, sew-on patches can outlast repeated washing and rough handling. This introductory guide pairs a custom patches comparison with practical notes on patch application methods and the durability of patches. Understanding these trade-offs helps you choose the right approach for your fabric, care routine, and design goals.
Using alternative terminology, you can think of adhesive-backed patches and stitched patches as two paths for decorating fabrics. LSI-friendly language connects these ideas to broader concepts like patch backing, embroidery, sewing, applique, and heat sealing. Each approach aligns with different fabrics, care cycles, and design ambitions, influencing how the patch performs under laundering. By describing the methods as glue-on versus sew-on or heat-bonded versus stitched embellishments, you build a content network that helps readers discover related guidance on durability and application techniques. This framing supports users researching ‘custom patches comparison’ and ‘patch application methods’ while understanding practical outcomes.
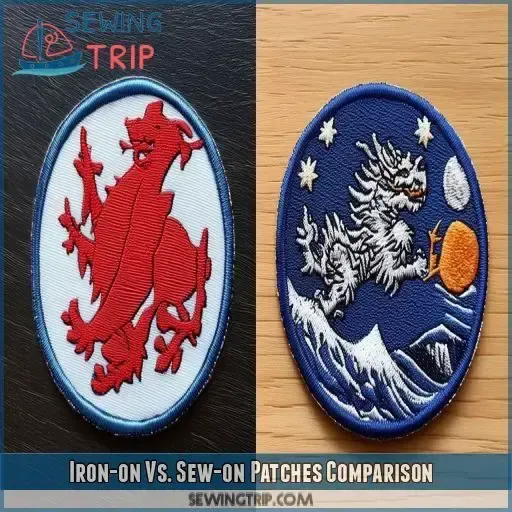
Iron-On Patches: Quick Customization for Everyday Fabrics
Iron-on patches use a heat-activated adhesive that bonds to fabric when heat, pressure, and time are applied. This patch application method is fast and convenient for DIY projects, mass customization, and quick branding across cottons, denims, twills, and many synthetic blends.
For everyday fabrics, iron-on patches provide a clean, flat finish when applied correctly. However, durability of patches can vary with washing and heat exposure, so it’s wise to consider care instructions and the occasional reinforcement with stitching for high-stress areas.
Sew-On Patches: Unmatched Durability for High-Wear Garments
Sew-on patches rely on a mechanical bond created by stitching the patch to the fabric. This patch application method is widely regarded as more durable over time, especially on items that undergo frequent washing or abrasion.
They work well across a broad range of fabrics, including delicate textiles that may not tolerate heat-based adhesives. If a patch begins to loosen, sewing it more securely is often simple, and the stitching itself can become a deliberate design element.
Iron-On vs Sew-On Patches: A Comprehensive Custom Patches Comparison
When you compare iron-on patches to sew-on patches, you’re weighing speed, ease, and initial appearance against long-term durability and repairability. This custom patches comparison highlights how each method suits different fabrics, wash routines, and use cases, guiding you toward the best fit for your project.
A balanced approach often emerges from understanding patch materials, backing options, and fabric weight. Iron-on patches shine for quick customization on sturdy fabrics, while sew-on patches excel in high-stress areas and garments that endure frequent laundering, providing greater durability of patches over time.
Patch Application Methods: Practical Guidance for Setup and Care
For iron-on patches, start with the manufacturer’s heat setting, use a pressing cloth, and apply even pressure in small sections to achieve a strong bond. This approach minimizes scorching and ensures the adhesive infiltrates the fabric fibers for a clean, durable edge.
Sew-on patches require careful placement, pinning, and methodical stitching along the border to maximize durability. Reinforcing with a light zigzag stitch can further improve longevity, especially on thicker fabrics or multi-patch layouts.
Fabric Compatibility and Care: Choosing the Right Patch for Your Garment
Different fabrics respond differently to patch application methods. Denim, canvas, twill, and cotton blends often take iron-on patches well, while delicate fabrics like silk or chiffon may benefit from sewn patches or stabilized backing.
Care and washing practices influence patch longevity. Turn garments inside out, use gentler cycles, and avoid high heat drying where possible for iron-on patches. Sew-on patches tend to resist heat better, but prolonged abrasion can still affect stitching over time.
Designing Patches for Longevity: Hybrid Approaches and Practical Tips
If you’re designing a line of patches, offering both iron-on and sew-on options can maximize reach. A hybrid approach—using iron-on for quick placement and sew-on for long-term security—aligns with the custom patches comparison mindset and can appeal to a broader audience concerned with durability of patches.
Thoughtful design considerations—backing type, patch size, and fabric compatibility—help ensure your patches perform as intended in real-world use. Testing on representative fabrics and providing clear care guidance will support longevity and customer satisfaction.
Frequently Asked Questions
What is the difference between iron-on vs sew-on patches, and when should you choose one over the other?
Iron-on vs sew-on patches use distinct bonding methods. Iron-on patches rely on a heat-activated adhesive for a quick, at-home application on many fabrics, while sew-on patches use stitching for a mechanical bond that’s highly durable through washing. Choose iron-on patches for fast customization on sturdy fabrics like cotton, denim, or blends, and opt for sew-on patches when you need long-term durability, high-stress resistance, or work with fabrics sensitive to heat.
How do patch application methods differ between iron-on patches and sew-on patches, and which is easier for beginners?
Patch application methods differ in heat versus thread. Iron-on patches require heat and pressure with a iron or heat press to activate the adhesive, making initial placement quick and straightforward for beginners. Sew-on patches involve stitching the patch to the fabric, which can take longer but offers a hands-on, permanent hold and greater reliability in many use scenarios.
Which fabrics are best for iron-on patches vs sew-on patches, and how does fabric type affect durability of patches?
Fabric choice matters for both methods. Iron-on patches perform well on denim, twill, cotton blends, and other fabrics that tolerate heat, but very lightweight or delicate textiles (like silk) may be better suited to sew-on patches. Sew-on patches tolerate a wider range of fabrics, including delicate textiles, and often provide superior durability under frequent washing and abrasion.
How does washing and care affect the durability of iron-on patches compared to sew-on patches?
Care routines influence longevity. Iron-on patches can lose adhesion with repeated hot water cycles or high-heat drying, so cool washes and air drying help preserve them. Sew-on patches aren’t heat-sensitive in the same way, but heavy abrasion can loosen stitching over time. For best results, turn garments inside out, use gentle cycles, and reinforce patches by stitching their edges.
Can I combine iron-on and sew-on patches for a custom patches comparison, and when does this hybrid approach make sense?
Yes, a hybrid approach is common in a custom patches comparison. Use iron-on patches for quick placement and then reinforce the edges with sewing to improve durability, especially on high-wear areas. This combination leverages the speed of iron-on patches and the lasting security of sew-on patches, offering flexibility across fabrics and use cases.
What are best practices for applying patches on common items using iron-on vs sew-on patches, such as denim jackets, backpacks, and kids’ clothing?
For denim jackets and backpacks, sew-on patches excel in high-friction areas, while iron-on patches can speed up initial customization. Kids’ clothing benefits from iron-on patches for quick fixes, but sewing them on provides extra security for school uniforms or items that endure frequent washing. In heavy outerwear, prioritizing sew-on patches is often best, while fashion or cosplay projects can benefit from a mixed approach that balances appearance and longevity.
| Topic | Iron-On Patches | Sew-On Patches |
|---|---|---|
| How they work | Bond to fabric with heat-activated adhesive (heat, pressure, and time). The glue melts during ironing for a quick, mess-free installation. | Stitched to fabric with thread for a mechanical bond; no heat required. Durable across many washes. |
| Benefits | Easy installation, fast and clean-looking; strong initial bond on cottons, denims, twills, and blends. | Very durable with frequent washing/abrasion; works on delicate fabrics; repair-friendly; stitching can be a design feature. |
| Limitations & care | Heat compatibility issues for very lightweight or delicate fabrics; glue can degrade with repeated washing/high heat; removal/repositioning is difficult. | Requires sewing time/skill; visible stitching can be intentional or distracting; thread quality matters for long-term durability. |
| Durability & washing | Adhesive can weaken with repeated washing and high heat; best for lighter-to-medium use scenarios. | Generally more durable under frequent washing; not heat-sensitive; stitching can wear but is protected by fabric if done well. |
| Fabric compatibility | Good on denim, cotton blends, and similar fabrics; very lightweight or delicate fabrics (silk, sheer synthetics) can be problematic; may require lower heat or backing. | Works broadly across fabrics, including delicate textiles; not heat-dependent, but stitch count/density matters on thick fabrics. |
| Patch materials & design | Patches (embroidery, woven, PVC) with adhesive backing; backing and fabric compatibility influence adhesion; PVC/backing varies by patch. | Patches (embroidery, woven, PVC) designed for stitching; stitching can enhance durability and texture; design may influence thread color choices. |
| Practical scenarios | Denim jackets/jeans, backpacks, kids’ clothing, light outerwear — quick customization on sturdy fabrics; moderate wash needs. | Denim, outerwear, bags, or items demanding long-term stability; high-friction areas benefit from stitching; suitable for heavy-duty use. |
| Step-by-step (iron-on) | 1) Preheat iron; 2) position patch; 3) cover with cloth; 4) press 15–30 seconds per area; 5) cool and check; 6) for extra security, sew edges. | 1) Position and pin; 2) stitch around border with tight running stitch or backstitch; 3) secure and trim; 4) reinforce with small zigzag stitch if desired. |
| Care & maintenance | Turn garment inside out; use gentle wash; avoid high heat; air-dry patches when using iron-on; consider reinforcements where needed. | Avoid heat on patches if possible; wash on gentler cycles; can tumble-dry if fabric allows; re-press or resew if edges loosen. |
Summary
Key points table provided above summarizes how iron-on patches and sew-on patches differ in function, maintenance, and real-world use. The table highlights the primary advantages, limitations, and scenarios for each method to help you decide which patch approach fits your project.