
If you’re updating a look or reclaiming a thrifted find, learning how to remove patches from fabric without damage can be surprisingly straightforward when you approach the task with a calm plan, the right tools, and a clear sense of which patch type you’re dealing with, whether it’s iron-on, sew-on, or embroidered, and you set aside time to proceed slowly. This beginner-friendly guide outlines practical, step-by-step techniques that work across iron-on, sew-on, and embroidered patches, while weaving in fabric patch removal tips to help protect color, texture, fiber integrity, and the long-term wear of the garment, so you can tackle patch removal with confidence. If you’re wondering how to remove patches from clothing without damage, start by identifying adhesives or stitches, gathering the appropriate implements such as seam rippers or small scissors, choosing a method that minimizes fuzz, fraying, or distortion, and testing a hidden seam or hem to confirm the method won’t alter the fabric’s drape or feel. For iron-ons, you’ll learn to apply gentle heat with a barrier like a pressing cloth, lift gradually, and address any sticky residue with solvent sparingly, while sew-on patches demand precise stitch-cutting and careful edge work to avoid holes, ensuring that general patch removal methods preserve fabric integrity. By following these methods, you’ll gain confidence for future repairs, discover sew-on patch removal tips, and preserve the garment’s color, texture, and structure even after removing patches, leaving you with a refreshed piece that looks intentional rather than altered.
Beyond patches, this topic translates to detaching decorative appliqués or removable emblems, where the goal is to preserve underlying fabric while restoring the garment’s clean surface. LSI-friendly terms include fabric applique removal, garment ephemera detachment, cloth patch detachment, and adhesive-backed motif removal, all centered on ethical repair and long-term fabric health. Whether you call it patch detachment, applique detachment, or motif removal, the same care principles apply: gentle handling, appropriate tools, and post-removal cleaning to maintain texture and color.
How to remove patches from fabric without damage: Understanding patch types and optimal approaches
Patches come in several forms, each demanding a slightly different removal strategy. Iron-on patches rely on heat-activated glue, sew-on patches are anchored by stitching, and embroidered patches may blend stitching with adhesive backings. Identifying which type you’re dealing with is the first step in a safe removal process. When you learn how to remove patches from clothing without damage, you tailor your technique to the patch’s construction and the fabric’s resilience, reducing the risk of tears or thinning.
With the patch type in mind, plan the approach around the garment’s fabric. Delicate materials like silk or fine knits require gentler methods, while sturdy fabrics such as cotton or denim can tolerate more aggressive steps. This planning mirrors practical fabric patch removal tips, guiding you to choose heat, solvent, or stitching-based methods that preserve texture, color, and strength. The goal is a clean removal that leaves the fabric intact and ready for cleaning or re-patching.
Tools and prep for safe removal: essential gear to remove patches from fabric safely
Gather a simple toolbox of common tools to maximize your chances of a clean removal. A seam ripper or small sharp scissors helps cut stitches around sew-on or embroidered patches, while sharp tweezers or needle-nose pliers lift edges and pull threads with control. Having a cotton ball or soft cloth and a mild solvent like rubbing alcohol or a gentle adhesive remover on hand lets you treat any glue residue without soaking the fabric.
For patches that use heat, you’ll also want an iron with a pressing cloth or parchment paper and a source of gentle heat, such as a hair dryer or heat gun set to a low setting. A mild detergent, a soft brush, and a small needle for touch-ups complete the kit. Preparing these tools beforehand is a practical step in the sequence of fabric patch removal tips and helps you work efficiently while minimizing the chance of accidental damage.
Gentle patch removal methods for iron-on, sew-on, and embroidered patches
Gentle patch removal methods prioritize minimizing stress on the fabric while effectively loosening the patch. For iron-on patches, start by softly heating the patch’s edge to loosen the adhesive, then lift gradually with a fingernail or tweezers. This approach aligns with the goal of removing patches from fabric safely and avoids sudden yanking that can stretch or tear fibers.
Sew-on and embroidered patches benefit from slow, precise work: inspect how the patch is attached, cut the stitches with care, and gradually loosen the edges. If glue is present, apply a small amount of solvent to a cloth and dab—never saturate—so you don’t flood the fabric. The emphasis here is on gentle patch removal methods that preserve thread integrity, prevent fraying, and keep the surrounding material smooth and intact.
Removing iron-on patches safely: heat control, edge lifting, and adhesive residue management
Iron-on patches are often the easiest to remove when you control heat and work slowly. Begin with a hidden test area to confirm the fabric won’t scorch. Then, apply gentle heat along the patch’s edge while moving the heat source to avoid concentrated hotspots. As the adhesive softens, carefully lift the corner and continue around the patch in a steady, even motion.
After the patch comes away, residues are the common follow-up challenge. Dab a cloth with rubbing alcohol or a mild adhesive remover to dissolve sticky remnants, testing first on an inconspicuous spot. Rinse the area with mild detergent and inspect for any texture changes. This adhesive residue management is a key part of fabric patch removal tips and helps restore the surface to its original feel.
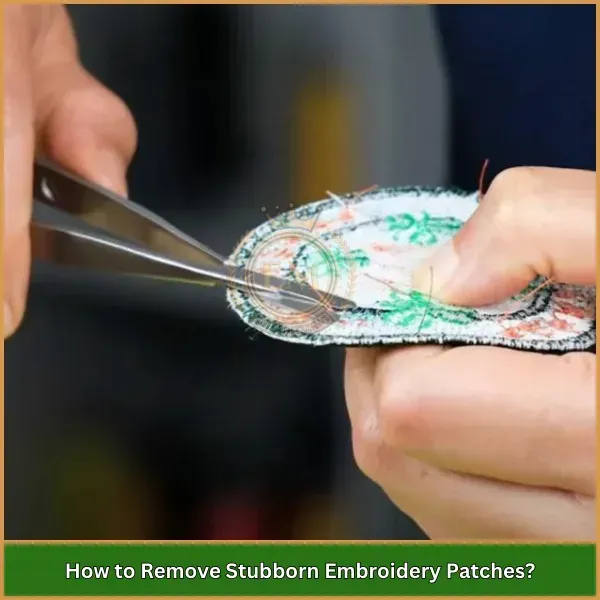
Sew-on and embroidered patches: achieving clean edges and minimizing fabric holes
Sew-on and embroidered patches require careful thread removal to avoid creating holes or frayed edges. Start by evaluating stitch types—straight, zigzag, or dense lock stitches—and then selectively cut each stitch close to the patch. Working slowly reduces the chance of tearing the fabric around the patch and preserves the garment’s overall structure.
Once loosened, gently pull the patch away from the fabric while inspecting the reverse side for any remaining threads. Tweezers are helpful for plucking out fine fragments, and a lint brush can lift tiny fibers without scratching the surface. If you encounter a few needle holes or a frayed edge, you can stabilize the area from inside with a tiny stitch or, if needed, cover it with a discreet patch on the reverse side for reinforcement.
Post-removal care, repairs, and preventing future damage
After removal, address any fabric changes with targeted care. Treat adhesive residue promptly, then wash the garment according to the care label. A gentle cycle and air-drying are often best for delicate fabrics, while sturdier textiles can tolerate standard washing. This post-removal care step helps restore texture and color, ensuring the fabric remains comfortable to wear.
If the removal reveals small holes or thinning, consider repair options that preserve a clean look. Invisible interior tacking provides stabilization, while a nearby patch can cover repaired areas without creating obvious bulk. For knit fabrics, light darning can fill minor gaps. Ending with a careful inspection and, if needed, a follow-up treatment using fabric softener or a rewash helps maintain the garment’s longevity and appearance.
Frequently Asked Questions
What are the best methods to remove patches from fabric safely without damaging the garment?
Identify the patch type and test heat on a hidden area. For iron-on patches, apply low heat and lift the edges slowly to release the adhesive without scorching the fabric. For sew-on patches, cut the stitches with a seam ripper, then gently peel the patch away and remove stray threads. If any glue remains, dab rubbing alcohol on a cloth to dissolve the adhesive, then wash the area. Following these steps helps you remove patches from fabric safely and preserve the garment.
What are some fabric patch removal tips to remove iron-on or sew-on patches without harming the fabric?
Always start with the gentlest method and test on a hidden seam or hem. For iron-on patches, use low heat and keep the heat moving to avoid heat damage, then lift the edge and peel. For sew-on patches, carefully cut the stitches and remove the patch, tidying up with tweezers to avoid fraying. Address any sticky residue with a small amount of rubbing alcohol on a cloth, then wash the fabric as usual. These fabric patch removal tips help minimize risk and keep the fabric intact.
How to remove patches from clothing without damage: steps for iron-on patches and sewing patches?
First identify the patch type and test heat on an inconspicuous area. For iron-on patches, heat gently to loosen the glue, then lift the edge and slowly work around the patch. For sew-on patches, cut the stitches, remove threads around the patch, and gently lift it away. If glue remains, dab a cloth with rubbing alcohol to dissolve the residue, then wash the garment. This approach shows how to remove patches from clothing without damage while preserving fabric integrity.
What are the most effective gentle patch removal methods for delicate fabrics like silk or knits?
Delicate fabrics require minimal moisture and no aggressive heat. Prefer seam ripping over heat-assisted removal, and work slowly to avoid holes. Use a seam ripper and tweezers to remove threads, then manage any adhesive with a small amount of solvent on a cloth with blotting rather than rubbing. If the fabric shows signs of puckering, stop and switch to a non-heat method or seek professional help. Gentle patch removal methods emphasize fabric care first.
Can you explain sew-on patch removal tips to minimize holes and fabric distortion?
Begin by inspecting how the patch is anchored (straight, zigzag, or dense stitches). Cut the stitches carefully with a seam ripper, taking care not to cut the fabric. Gently loosen and lift the patch, then remove any loose threads with tweezers. If you see small holes, stabilize from the inside with a tiny stitch and consider a discreet patch on the reverse side for reinforcement. These sew-on patch removal tips help minimize damage and keep the fabric looking neat.
What quick checks are part of fabric patch removal tips to avoid damaging the fabric?
Check the garment care label and test heat on a hidden area before any patch removal. Identify patch type (iron-on vs sew-on) and choose the safest method first. Work slowly, keep tools sharp and precise, and work in good lighting. After removal, treat any adhesive residue sparingly with rubbing alcohol and wash the area gently, then inspect for texture changes. These fabric patch removal tips prioritize care and reduce the risk of damage.
| Aspect | Key Points | Practical Takeaway |
|---|---|---|
| Patch types and expectations | Iron-on, sew-on, or embroidered patches each present different removal challenges. Heat can affect delicate fabrics; stitching can leave marks; adhesives may leave residue. The goal is to choose the right technique for the patch type and fabric. | Identify patch type first; plan method accordingly; avoid rushing to prevent damage. Always test heat on a hidden area before applying it to patches. |
| Tools you’ll need | Seam ripper or small scissors, sharp tweezers, cotton ball/soft cloth, mild solvent (rubbing alcohol or acetone) tested inconspicuously, iron with pressing cloth/parchment, hair dryer or heat gun on low, mild detergent, sponge/soft brush, small needle and thread for touch-ups. | Gather and test each tool; use a gentle approach on delicate fabrics and test solvents first on an inconspicuous spot. |
| Iron-on patch removal steps | 1) Test a hidden area with heat. 2) Heat the patch edge to loosen adhesive. 3) Gently lift a corner. 4) Slowly peel the patch away in steady motion. 5) Wipe residue with rubbing alcohol or adhesive remover (test first). 6) Rinse and inspect the area. | Follow the steps patiently; avoid yanking and re-check residue before cleaning. |
| Sew-on and embroidered patch removal steps | 1) Inspect stitches (type of stitch). 2) Cut threads with seam ripper around patch. 3) Loosen edges; check for glue residual. 4) Remove remaining threads with tweezers. 5) Treat leftover glue with rubbing alcohol or solvent. 6) Repair minor fabric after removal if needed. | Proceed slowly to avoid holes or fraying; clean up any glue residue carefully. |
| Fabric considerations | Cotton/denim tolerate heat and stitching well; wool can felt; silk/delicate synthetics are heat-sensitive; knits need care to avoid holes. Tailor approach to fabric type. | Use lowest effective heat for delicate fabrics; prefer non-heat methods for silk, wool, and knits; test on hidden areas. |
| Adhesive residue and care afterwards | Residue is common after patch removal, especially iron-on. Use gentle solvents, blot rather than rub, and rinse after treatment; wash garment per care label. | Address residue gently; avoid saturating fabric; follow with a mild wash. |
| Repair options after removal | Invisible repair from the inside, patch nearby if needed, or darning for small holes in knits. | Consider reinforcement and blending repairs to maintain garment appearance. |
| Tips to avoid damage | Test heat on hidden area; go slowly; use the right tools; ensure good lighting; seek professional help for high-risk fabrics like silk or wool. | Prevention matters: careful preparation reduces risk of damage. |
| Frequently asked questions | Heavily glued patches can still be removed with gradual heat and solvents; color change after removal is possible; if it’s too difficult, consider leaving the patch or consulting a professional. | Removal success depends on patch, fabric, and method; proceed thoughtfully. |
Summary
remove patches from fabric without damage is a practical skill for refreshing clothes, thrift finds, and upcycling ideas. Understanding patch types, selecting the appropriate removal method, and applying careful techniques for adhesive and thread work can yield clean results without harming the fabric. Test heat on hidden areas, proceed slowly, and use the right tools to preserve integrity and extend the life of your garment.